Hello, my name is Katrina and I am part of Tangie's creative crew. Each month I bring you a mixed media project using some of Tangie's products. This month I am using the July collage sheets available through the Art Journal Emporium.
I really loved the July collage sheets because I am very much a mountain girl! I love to be amongst the mountains. I am very lucky to be able to visit Austria twice a year to walk among them and take in their beauty.

I used 3 of the July collage sheets, the mountain one, the sunshine one and the poem sheet.
I cut the mountains out of the mountain sheet and measured and cut the sunshine sheet down to fit my page.

I then stuck my mountains in place so the sun looked as if it was rising up above the mountains.

The poem sheet has lots of poems on it so I chose the one I liked the most, cut the strips out and glued them on to my page.
I then used a stencil to add some Interest to the bottom part of the page making it look like a lake. I added some more colour to the sun, the mountains and highlighted the poem to finish.
So there we have it, a nice simple but effective art journal page using the July Collage sheets. I hope you like it.
What are you doing with your collage sheets?
I will be back again next month with another project to show you,
Untill then, take care and enjoy the sunshine!
Love Katrina x
[Posted by: Katrina Rollings]

Greetings and Salutations artsy peeps! It’s time once again for a peek of a few of the sparkling gems found over in Tangie Baxter’s Art Journal Emporium.
Our first bit of Art Journal Emporium goodness is by Deborah. She completed this week's Zine challenge. Love the color choices and bird inspiration.


Credits: Art Journal Emporium No. 30 Alchemy Worksheets by Tangie Baxter included as part of the Art Journal Emporium.
Up next is a delightful page by SBpoet. I adore the ordered chaos and grungy blending of this one.

Credits: Art Journal Emporium No. 25 Alchemy Worksheets, Aviary Grunge Overlays & Bonus Papers; Cheery-Cheek Grunge Overlays by Tangie Baxter
The last highlight for the week is by Penelope who used Art Journal Emporium Alchemy Worksheet No. 29 as a jumping off point for her message in this wonderful poetry page.

Credits: Art Journal Emporium No. 29 Alchemy Worksheets, July 2017 Art Journal Emporium Collage Sheets, Inexpressible August 2015 Grab Bag (retired), What We Are July 2015 Grab Bag (retired) and Release December 2016 Grab Bag (retired)
A Big Thank You to Deborah, SBPoet and Penelope for sharing art work with us.
Be sure to check out this year’s Art Journal Emporium.
There are three ways to join - one could be just right for you!
Happy Creating!
[Posted by: Susan]
Hello! My name is Katrina and I am a member of Tangie's Creative Crew.
Every month I create a Mixed Media project to share with you. This month I have created a back to school planner.
I know, the children haven't even finished this school year yet! I don't know if it is the same in the USA as it is here in the U.K. but the shops are already full of new school uniforms, school bags and stationary. So I thought I would join them and get super organized for the next school year.
Of course it doesn't have to be used to organize school life, it is a planner that can be made to fit into everyone's life because I have tried to make it as flexible as I can.

I have gone for a planner cover with a deep spine so you can add as many parts as you need.
I will show you how I made a planner for a teenager taking the big step up to senior school. This happens in the UK at 11 years of age. It is quite a step as they go from having one teacher in one classroom in a small local school, to managing their own timetable in a very large school. I thought it would be nice if they had a bright and fun planner to help them.
This is quite a tutorial so grab yourself a cuppa, get comfortable and let's begin.
To start with you will need to do some work on your computer, working in your Photo Editing software. The size of all the finished books will be A5, so we will need to resize papers to A5 ( half of A4). I used Tangie's "Quickity Split Refill {Delightful Collection}" and "Quickity Split Refill {Joyous Noel Collection}" for the background papers.
"Quickity Split Refill {Delightful Collection}"

"Quickity Split Refill {Joyous Noel Collection}"

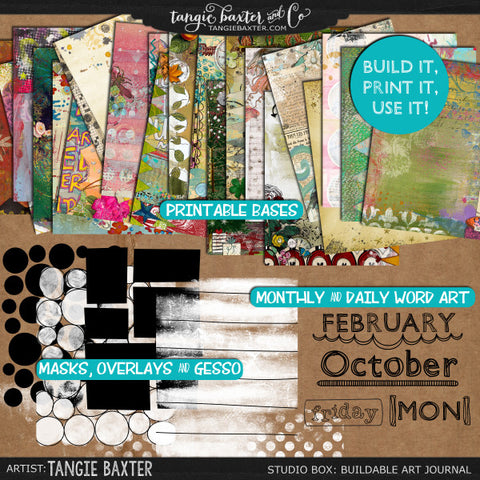
I also used the "Studio Box: Buildable, Printable Art Journal" kit. This kit is wonderful as it has templates you can lay over your backing papers to make them into diary style pages. The kit also has months of the year and days of the week. I made up my diary pages by making an overlay which I could then just copy and paste on top of my chosen backing paper. It makes it very quick and easy to do.
"Studio Box: Buildable, Printable Art Journal"
You will need to print out -
- A5 diary sheets, I printed enough for the first term.
- A5 papers for the front and back of the diary and (4) A5 papers to decorate the timetable folder.
- Full A4 background papers x 6 to cover the planner cover and pockets.
Once they are all ready, print them out.

I started building the planner by cutting some stiff white card to the measurement in the photo below

You will notice there are 2 parallel lines about 1/2 inch in from the sides of the spine. You need to score and fold these lines and then glue your front and back panels onto these thin pieces so it forms the spine as shown below.

Now we need to cut the pocket pieces and another front and back piece to use to stabilize the cover. Cut the pieces as in the photo below. I did cut an extra pocket for the back cover which is not shown in the photo.

Before I covered the planner cover I added a small piece of elastic to hold a pen. I used extra strong double sided tape to hold the elastic in place, then used wet glue to stick the stabilizing pieces in place. You might need to use a couple of cloths pegs to hold the cardstock together around the elastic until it is dry.

Now we can cover the planner cover with the A4 backing papers. I covered the covers and pocket pieces then glued them in place. Then I used my crayons to decorate the papers.

Now that the cover is finished we can start on the books. The first is a diary planner. I folded 12 sheets of A4 paper in half and then divided them into 2 groups also known a folios. Then, I took a sheet of A4 card and folded it in half to form the cover. I used a long arm stapler to staple the 2 folios into the cover as close to the spine as possible. If you don't have a long arm stapler you can stitch the folios into your book.

Trim your edges to make it neat and tidy.
Now get another cuppa and get ready to cut your diary pages apart and stick them into your planner diary.
When I was planning my pages back on the computer I made some pages for Halloween and Christmas.


As you can see I repeated the backing paper for my 2 week spread. You may have also noticed there are no dates or months. Well I have a plan for the months that I will show you in a mo but I wanted the planner diary to be flexible so I thought you can just write in the date when you want to use it.
I also printed out a planner diary front cover and used a backing paper for the back too.

I wanted a place to put the timetable. Now I have no idea how they get their timetables these days, so I just made a pretty cover for them to keep a printed copy in.
Again I printed off a cover.


I also covered the inside of the cover with beautiful papers from the kit.
Now we can put the planner together. I used elastic cord, you can get it in all kinds of colours to match your planner. I cut a length of the elastic cord and wrapped it around the spine and tied the ends together. You need to pull it tightish but not too tight. I then threaded the planner cover through the elastic cord on the spine of the book and sat it on the planner cover spine. There is room enough for a few books made this way so you can add however many you want.

You remember I said I had a plan for adding the months to the planner diary. Well here is what I have done. I am lucky enough to have a Silhouette CAMEO® electronic cutting machine. So I cut some tabs and as the machine also draws and writes any font you have on your computer I used a font from Tangie's "FONTASTIC! 65 FONTS GRAB BAG!" called AJFgoldenafternoon to write the month on each tab.
"FONTASTIC! 65 FONTS GRAB BAG!"

I thought you could add these to the edges of the planner diary pages as you need them.

I also made a envelope to keep them in with a leftover sheet of paper.
Well, that's it. All that is left to do is to show you my finished planner.

Front cover: I cut the word Planner on my Silhouette CAMEO® using Tangie's font tweedledumb, also from the "FONTASTIC! 65 FONTS GRAB BAG!".

The tags are there to show you the pockets but thinking about it, it would be nice to write some quotes on them perhaps.


Then the back back cover with another pocket for the envelope full of months and bright pen to finish it off.
Wow! That was a long tutorial! Thank you for staying with me to the end. I really hope you like my planner idea and will have a go at making one yourself. You really don't have to make the same books as I did just make it your own. Perhaps a sketchbook and quote collection or your bespoke cookery book with a book for sweet and book for savoury. There are so many ideas.
If you have any questions about the planner I would be only too happy to answer them.
I will be back again next month with another Mixed Media project to show you. Until then take care.
Love Katrina
[Posted by: Katrina]
This year in the Art Journal Emporium, Tangie is providing us with weekly Alchemy Worksheets to help us find deeper meaning in our art and in our life.
Here are a couple of journal/quote pages using the Alchemy Worksheets and Extras from the June deliverables included in the Art Journal Emporium.


I hope these pieces inspire you to create your own art using the elements from the Alchemy worksheets.
[Posted by: Jan Nicholas]
4th of July Banner
This banner was created to celebrate the United States’ Independence Day. I used Tangie Baxter’s Hexofit No 9 July 4.
Since the shape is hexagonal, it was easy to turn the images into stars. I used red, white and blue scrapbook paper for the “star” part and glued the hexagonal shape onto center. Then I used jute for the string.
(yes that is London Bridge and Eiffel Tower - part of my Lego collection)

Closer views of the 8 stars:


For the Hex of It No. 9

I hope you enjoy this idea. Happy 4th of July!
[Posted by: Jan Nicholas]
Hi, Everyone. I'm happy to announce the May & June Brushes are in the TB&CO Shop!
"2017 Brush of the Month Club -May Brushes"

"2017 Brush of the Month Club -June Brushes"

Do you want all 12 Brush of the Month packs for one amazing price? Get these brushes and more in the 2017 Brush of the Month Club.
ARE YOU A MEMBER OF TANGIE'S "ART JOURNAL EMPORIUM"? If you pay monthly for Subscription B or C, these brushes are NOW INCLUDED in your membership!
Also NEW in the TB&CO Shop:
"Graffiti Infrastructure No. 1 (Layered Files, Brushes & pngs)"

"Aviary Grunge Overlays & Bonus Papers"

Hope you enjoy these new releases!
[Posted by: Joy]


Hello, Katrina Rollings here again. I am part of Tangie Baxter's Creative Crew. Each month I create a mixed media project to share with everyone here on the blog.
Now, I do have to confess, I had the idea for this project a while ago, well to be honest quite a while ago. I have been moving these collage sheets I created from pillar to post on my desk for months, each time thinking "I must finish that ". Well the time has come! Here is my "I love the Doctor" zine.
Tangie Baxter showed us how to make these little books as part of the Art Journal Emporium Loyalty Rewards program. They are made out of a single piece of A4 cardstock, folded in such a way it leaves you with a cute little book or journal to play with. I made mine from watercolour paper so I could use watercolours to create a background. Then the world is your oyster as to what theme you choose.
Dr. Who has always been in my life and I still enjoy his adventures. They film it in and around Cardiff in South Wales which is just across the river Avon from my city, Bristol. Tangie has a fantastic kit for Whovens (Dr. Who fans ) called "Love the Doctor". I used a part of the kit in my zine.
"Love The Doctor {Bundle}"

To start with you need to print out your images sized to fit your zine. If you use an A4 sheet of card your finished Zine will be roughly 4"(10.5cm) high and 2.75" (7cm) wide.

If you have been with the Art Journal Emporium for 18 months you will receive access to "What a Wonderful World Zine Workshop". Inside the workshop you will receive a template and instructions on how to fold your Zine and some lovely images to use. Those of you who have not been with us that long yet can still join in and make a zine by following my steps.

Take your A4 sheet of cardstock and fold as I have done in the photo above. You then need to cut the middle two 1/4's where they join, along the middle fold.
Create your background. I find it easier to lay the zine flat and paint the whole thing. Don't think about it too much, you just want to have a coloured background that fits with your Zine's theme. You can add specific background details once it's folded up into your Zine. Let background dry.
Once dry you can fold it up -
The way to do that is to first re- crease all the folds. Fold in half horizontally and crease the central vertical crease so you have a cross shape.


You can then fold two of the cross sides around to form the covers of you zine. You might need to fiddle around with it a bit to ease the folds a little but it will end up as a little book.

Now the fun bit...............make it your own and decorate it.
Here is how mine ended up-

My front cover

First pages.
I added some stars through out my Zine using a product called Buff-it by Pinflair Creative Crafts, through a stencil.

Of course you have to have a Dalek where there is Dr. Who, although it was the Cybermen that scared me when I was young. I love to create my own lettering. If that's not your thing then perhaps use letters cut from a newspaper or magazine or just use your computer to generate your letters and cut them out.

Last 2 pages.

The back cover. Don't forget to sign it and add the date.
These are such fun to make. They would make a great project for children to create on a rainy day.
You can make these using any size paper or cardstock. I have made a larger one from a larger sheet of watercolour paper to take on my holiday with me, I can't possibly go a whole week without having something with me to work on and these are ideal.
Thank you for letting me share my project with you. I would love to hear what you have done with your Zine.
Until next month when I will have another mixed media project for you, take care
Love Katrina
[Posted by: Katrina Rollings]
This year in the Art Journal Emporium, Tangie is providing us with weekly Alchemy Worksheets to help us find deeper meaning in our art and in our life.
I really liked the word Makarios from May's Alchemy Worksheets.

I wanted to use some of the quotes that Tangie provided.

I hope these pieces inspire you to create your own art using the elements from the weekly Alchemy Worksheets included in the Art Journal Emporium.
[Posted by: Jan Nicholas]

Hello fellow art lovers and creators! It’s time once again for a peek at a few of the sparkling gems to be found in Tangie Baxter’s Art Journal Emporium...
First we have this wonderful piece by Mylinn. So much to see and think about!

Credits: Art Journal Emporium No. 19 - Alchemy Worksheets Set "Favorite Quotes"
Next, Terry G brings us a really cool magazine mock up that keeps us thinking - this time about the “electric” nature of thoughts, ideas and enlightenment.

Credits: Art Journal Emporium No. 16 & 17 - Alchemy Worksheet Set "Illuminate" and a magazine mockup template by Mats-Peter Forss.
And finally, we have this funky page by Kim Pay that plays with the possibility of an overabundance of electricity and ideas.

Credits: Art Journal Emporium No. 16 & 17 - Alchemy Worksheet Set "Illuminate" and also face from Rachel Verdi.
Thanks to Mylinn, Terry G and Kim Pay for sharing their creations with us! Please don't forget to leave them some love!
Be sure to check out this year’s Art Journal Emporium.
There are three ways to join - one could be just right for you!
[Posted by: Glenda]


I really liked the bird on this month’s collage sheets included in The Art Journal Emporium. For the past year, I have been working on faces and the hat on this face just needed a bird decoration. I also used one of Tangie’s quotes also part of this month's deliveries from week 19.

I hope this inspires you to use the collage sheets.
[Posted by: Jan Nicholas]


