Hello and welcome to my October Mixed Media blog post. My name is Katrina Rollings and I am a member of Tangie's Art Journal Emporium Creative Crew. Each month I create a Mixed Media cut and paste project to show you the versatility of digital kits.
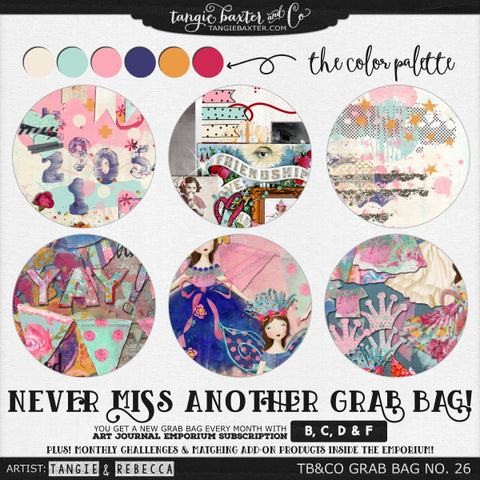
This time I have used TB&CO Grab Bag #26:
I have not worked in my journal this month but made a concertina Tag journal.
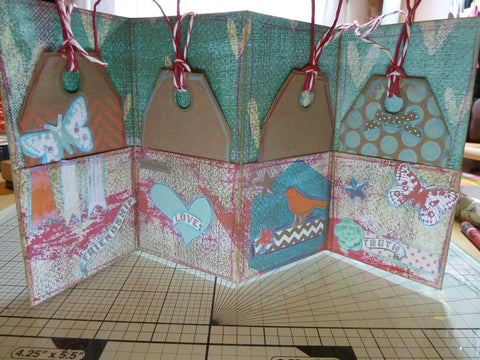
This is a very easy little journal to make. I thought it would be ideal for a travel journal, if you were only away for a few days, a cute way of passing on your family recipes at Christmas or if a family member is off to university or just as a special card, you could include inspirational quotes or have the tags as places for lots of people to sign their name. So lots of ideas and I am sure you can add to the list too.
So lets get started.
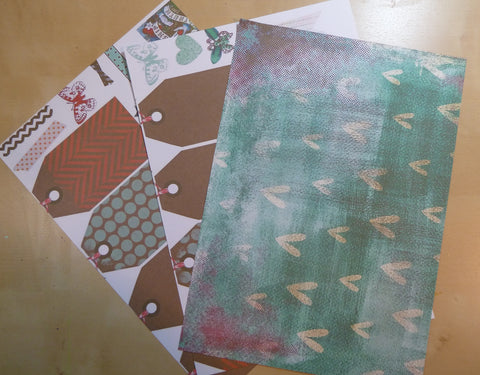
The first thing you need to do is print off one of the beautiful papers from the kit onto a piece of A4 printable cardstock (comparable to 8.5 x 11 inch cardstock). You will need to do this through which ever photo editing software you use as they are 12 x 12 inch papers in the kit so you need to make them into A4. It is very easy to do, just shrink them down to fit your paper. Remember also to set your printer to borderless. If your printer doesn't do that not to worry just trim off the white borders, your journal will just be slightly smaller.
Print one side, then turn that piece of printed card over and put it back through your printer and print a different paper from the kit onto the reverse side. You will then end up with a piece of cardstock with printed paper on both sides. This sheet of cardstock will become your little journal.
You then need to print out 4 of the tags (they need to be around 4 inches high) Then copy, paste and flip horizontally so you have the same tags but flipped over so they can become the backs of your finished tags when they are stuck together with the original ones.
You will also need to print out some of the embellishments you'd like to decorate your little journal.
Now we are ready to make up our journal.
Take your printed cardstock and place it on your table with the longest sides top and bottom.The pattern facing you will be the pattern that is inside the journal, so choose your favourite.
- Fold your card in half from left to right. Crease well. Unfold.
- Then fold from left to the central fold. Crease well and unfold.
- Then fold again from right to the central fold. Crease well and unfold.
- To make the pockets you need to fold the bottom edge up about 2 inches. Crease well.
You then should have something that looks like this

I then inked around all the edges using a Tim Holtz® Distress Ink Pad but if you don't like that look then you can leave this step out.
Now for the tags:
Cut them all out so you have 8 tags in all. Cut or punch the holes of your tags out now before you stick then together, it makes life easier believe me!!

You then need to stick them together to make 4 tags. If they don't quite fit not to worry, just trim off the white parts that show and no one will ever know!
I then inked around each tag, again you needn't do that if you don't want to.
You also need to add some ribbon or string to the tops of your tags so they look like this

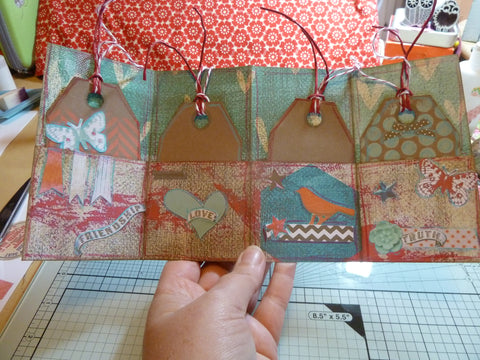
So going back to our Journal all we need to do now is add some glue to the open sides of the pockets and to the folds to form the other pockets and we can then decorate it with the embellishments we printed out earlier.

Don't forget the front cover too!

Well, there we are, your Concertina Tag Journal all finished.
I hoped you enjoyed my project and will think about using your digital kits in other ways.
Join me again next month for another Mixed Media cut and paste project, I would love your company.
Love Katrina
TB&CO Grab Bag #26 {October 2016} is only available for a limited time and is priced on a sliding scale, so act fast for the best deal! For more information visit TB&CO Grab Bags.
[Posted by: Katrina Rollings]


A few years back we had a feature called "Art Travels with Rain". Rain did a wonderful series on sewing that we are reposting in our Flashback Fridays segments. Please note these may be altered from the original posts to update links, provide information on newer programs, etc.
In case you missed earlier posts in the series:
Art Journaling Sewing Lessons 101
Lesson One: Making Borders and Pockets Using Automatic Machine Stitching
Lesson 2: Using Fusible Interfacings to Attach and Glue Papers and Fabrics
Lesson 3: Thread Painting and Interlacing, Part 1 of 2
Lesson 4: Thread Painting Part 2 of 2

Hello all!
This week we will take a closer look at interlacing and piercing with paper, and begin to look at couching. These are wonderful skills to have in your toolbox for art journal pages, scrapbook or sketchbooks, or other art projects.
Interlacing and Piercing
Many thicker and heavier threads, yarns, and ribbons are too big to pass through a sewing machine needle, a smaller hand needle, and really shouldn’t be pulled through paper over and over since eventually both the fiber and the paper will fall apart. This is where piercing a channel through the paper first makes a huge difference, particularly if the hole is stabilized with a brad, an eyelet, or stitching. Piercing a hole before hand stitching on paper also makes it far easier on your wrists and fingers to form the stitch since paper will not fold and bend as easily as a fabric.
Below are a few pages from my hand stitching sketchbook:
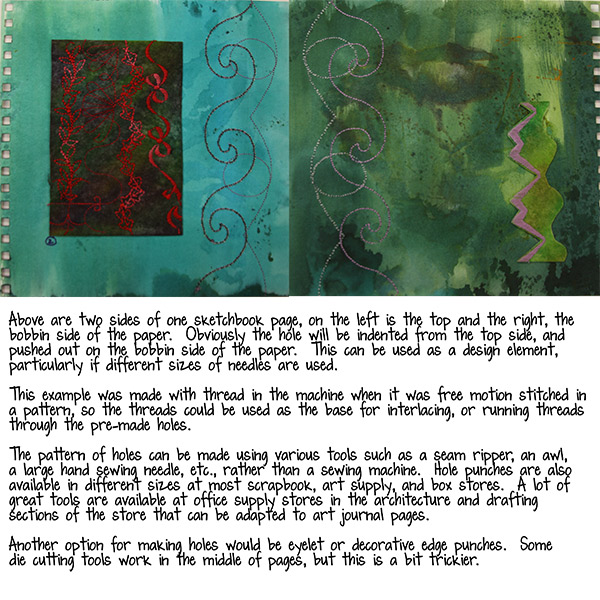
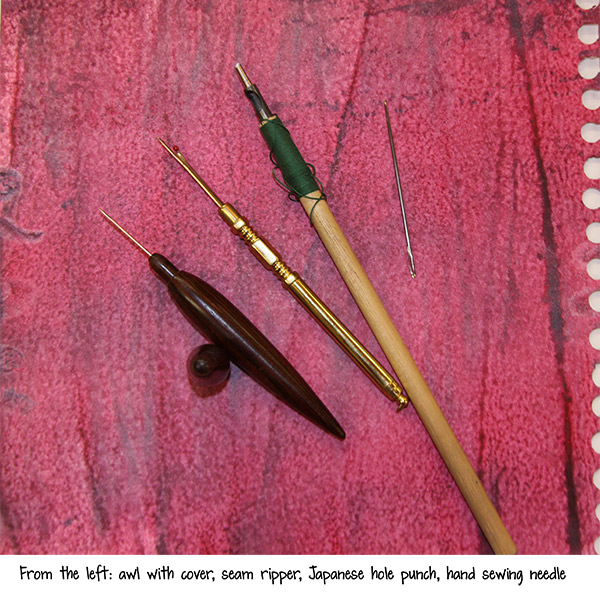


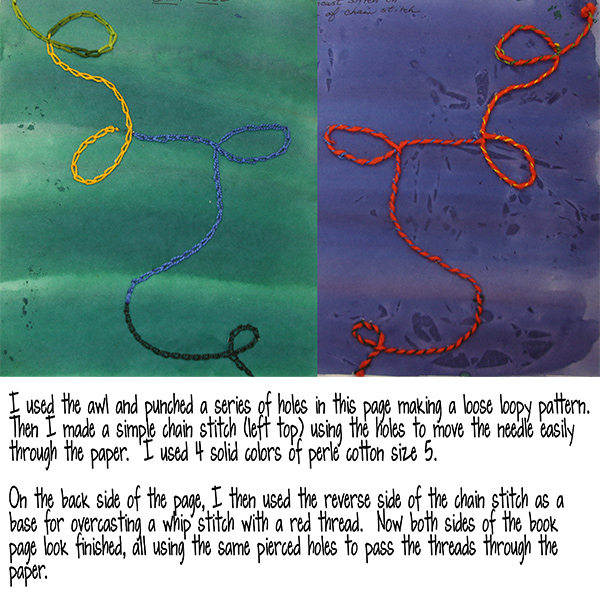
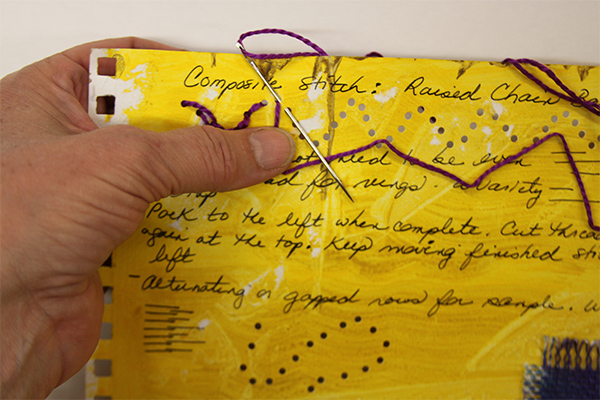
Below is another image of holes that were punched with the larger Japanese hole punch into painted sketchbook paper, and the beginnings of chain stitch.
The next two images are the front and back side of one page out of my hand stitching book, with pen, ink, paint and marker drawings. The edges of the page were pierced with a seam ripper first, then overhand stitched first with yellow, then back the opposite way with green. In the lower right corner you can see the back side of the chain and feather stitching.

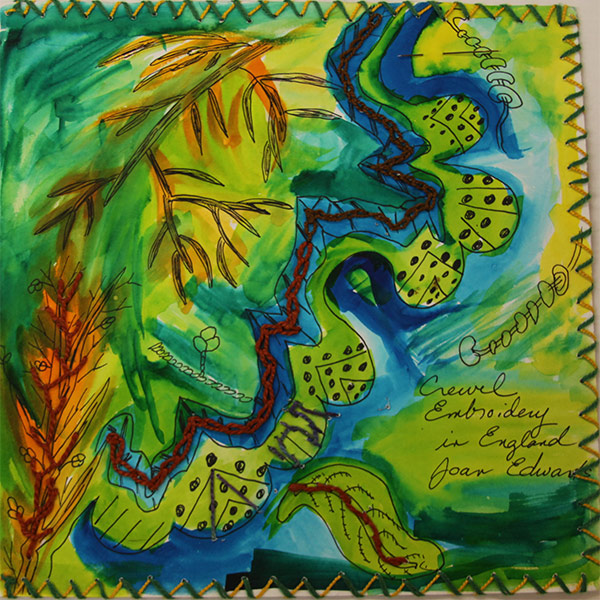
And another edge with pierced holes:
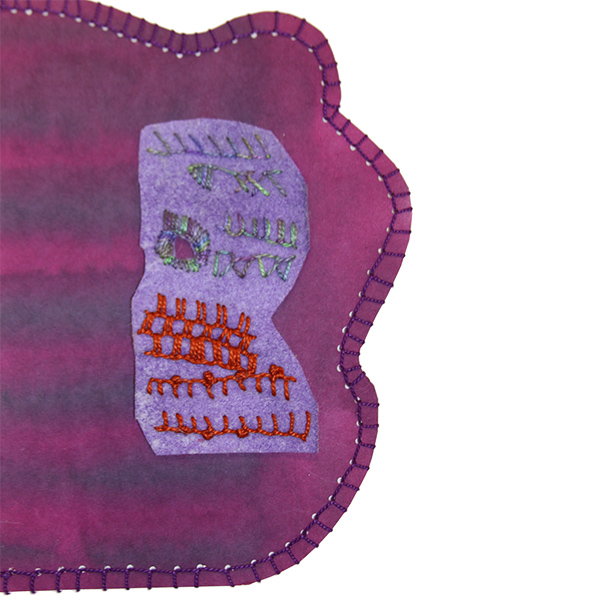
Below is another page from the same book, this one a stitched collage of my painted and monoprinted paper. I am using the machine stitches of the collaged bits to anchor hand stitches with a thicker thread. Since the automatic decorative stitches have a lot of thread bars, I can pick and choose where to insert the needle for my design.
It isn’t necessary to have a sewing machine to make the thread bars, you can also just lace thread through pre-punched holes, then use those thread bars as an anchor for further embellishment.

Let’s look at a “Junque Journal” cover I made from a printed page from Tangie’s “Gypsy Diaries” workshop. Below is the finished and mounted cover:
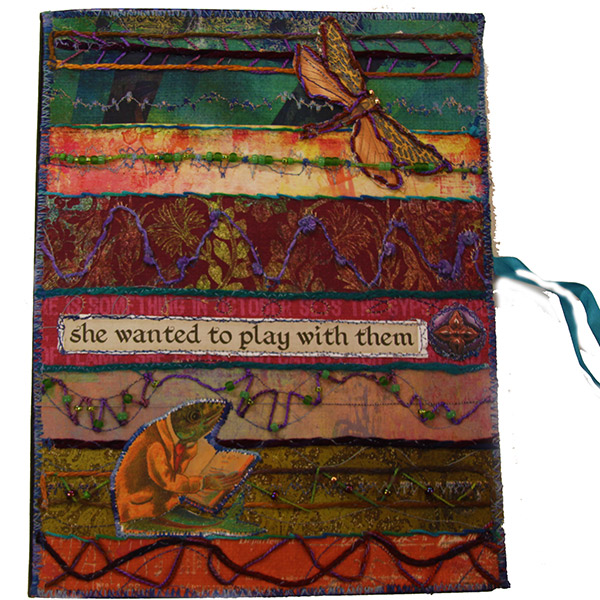
In part 2 of Interlacing, Piercing, and Couching, we will take a close look at making this journal cover which includes all of these techniques.
~~~~~
Please join us next Flashback Friday for another Art Journaling Sewing Lessons installment.
Have a great weekend!
[Posted by: Joy]


Welcome to Wednesday and a new featured TB & CO Treasure! The TB&CO Treasures Collection will feature some of our all-time favorite products each week. The ones that you may not have seen before, or maybe they've been on your wish list for a while? These kits and workshops are too good not to share again, so we will be highlighting a few of our staff's picks every Wednesday. The really exciting part is that you can shop each week's selections for 50% OFF the original price! Just use coupon code Treasures50 at checkout.
This month we will be featuring items perfect for Halloween Art Journals and all kinds of fun projects for the Halloween season.
Here is a peek at this week's featured items:
"Collage Sheet Workshop #04 {Oct '14 Delivery}"

"ARTist Collage Sheet #948"
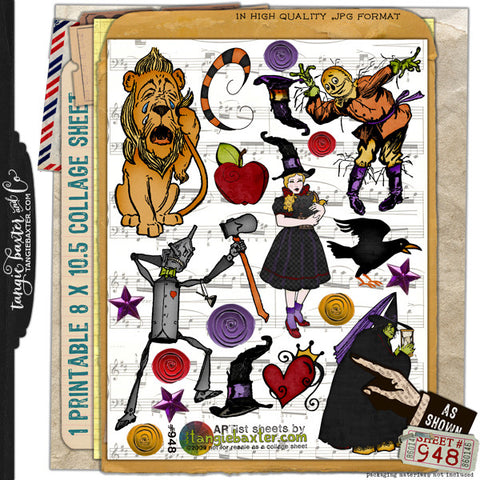
"ARTist Collage Sheet #949"

"ARTist Collage Sheet #987"
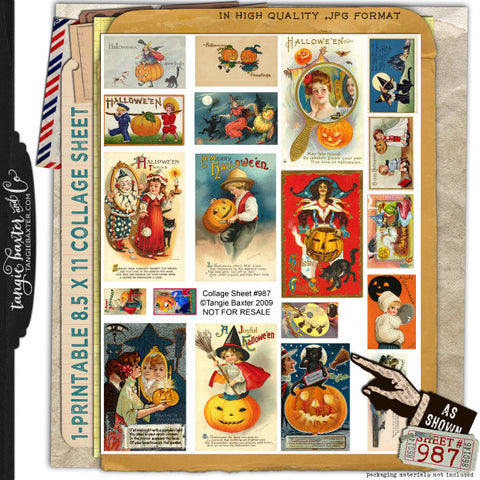
"ARTist Collage Sheet #988"

"ARTist Collage Sheet #991"

Be sure to check back every Wednesday for a new selection! You can always find the Treasures Collection using our "Shop All" button on the store menu.
[Posted by: Joy]

When I opened up the documents I felt such joy and happiness - the pastel colors and fun elements brought such a smile to my face. No wonder the theme for this monthly Grab Bag is “JUBILATION.” Rebecca’s art doll - “Velle” has a wardrobe that evokes images of celebration and merriment. The pieces of this collection can be used in both digital and mixed media formats.
TB&CO Grab Bag #26 {October 2016} is only available for a limited time and is priced on a sliding scale, so act fast for the best deal! For more information visit TB&CO Grab Bags.

I had such fun working with this grab bag and want to share three of them with you. I hope these examples of creative things you can do with the bits and pieces included in the TB&CO Grab Bag #26 {October 2016} will inspire you to do your own.

“Good Times” - loved all the flowers from both Rebecca and Tangie’s sets and just had to create a wreath.

“Celebration” - yes it’s a celebration with a birthday cupcake.

“Merrymaking ” - Velle is so stylin’ with all her adorable outfits.

“Joy” - just love this little girl!
All examples are 100% October Grab Bag papers and elements. I hope you enjoy these examples and are inspired to get the monthly Grab Bag to design your own unique art.
[Posted by: Jan Nicholas]
Hi, Everyone! Happy Thursday! The weekend's almost here! And what's a better way to enjoy the weekend than with the newest grab bag release from TB&CO.
October's Grab Bag has been released early. Sneak peek pictured below.

TB&CO Grab Bags are available on a sliding scale so act fast for the best deal! If you are FAST you can get the grab bag for only $6 the first 24 hours.
SPECIAL: Tangie's going to be out of town so the grab bag will remain $6 until Monday 10/10 and she revealed the full previews early!
The grab bag then goes up by $1 each day.$7 the next day (we will reveal full previews on this day)
$8 the next day
$9 the next day
$10 the next day
Then it will be broken up into our individual stores for FULL PRICE. Never miss another grab bag at the $6 price! You can purchase a subscription, where you automatically get the grab bag every month at the $6 price! (If you purchase a new subscription which includes grab bags any time in October 2016 you will get the October 2016 grab bag even if it is no longer available to the public!).


[Posted by: Joy]

Welcome to Wednesday and a new featured TB & CO Treasure! The TB&CO Treasures Collection will feature some of our all-time favorite products each week. The ones that you may not have seen before, or maybe they've been on your wish list for a while? These kits and workshops are too good not to share again, so we will be highlighting a few of our staff's picks every Wednesday. The really exciting part is that you can shop each week's selections for 50% OFF the original price! Just use coupon code Treasures50 at checkout.
This month we will be featuring items perfect for Halloween Art Journals and all kinds of fun projects for the Halloween season.
Here is a peek at this week's featured items:
"ARTist Collage Sheet #864"

"ARTist Collage Sheet #865"

"ARTist Collage Sheet #866"

"ARTist Collage Sheet #857"

"ARTist Collage Sheet #859"

"ARTist Collage Sheet #858"

Be sure to check back every Wednesday for a new selection! You can always find the Treasures Collection using our "Shop All" button on the store menu.
[Posted by: Joy]


A few years back we had a feature called "Art Travels with Rain". Rain did a wonderful series on sewing that we are reposting in our Flashback Fridays segments. Please note these may be altered from the original posts to update links, provide information on newer programs, etc.
In case you missed earlier posts in the series:
Art Journaling Sewing Lessons 101
Lesson One: Making Borders and Pockets Using Automatic Machine Stitching
Lesson 2: Using Fusible Interfacings to Attach and Glue Papers and Fabrics
Lesson 3: Thread Painting and Interlacing, Part 1 of 2
Enjoy!

Hello all,
Well here we are a week later and the flood waters have receded, thank God. Meanwhile, our daughter is in labor with our first grandchild! Never a dull moment around here!
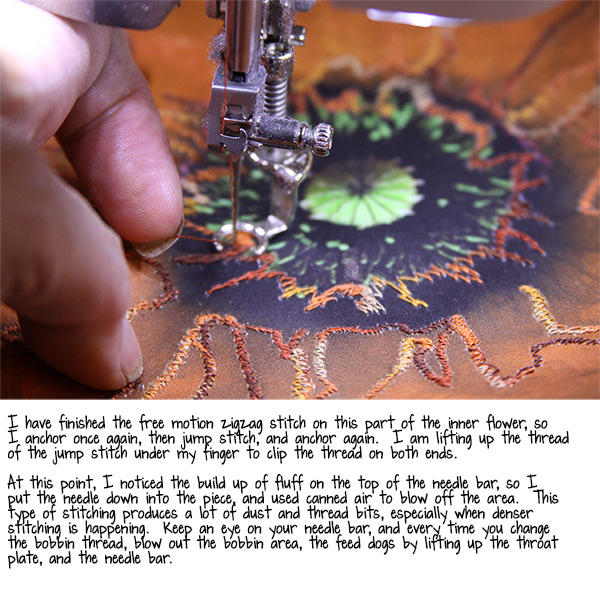
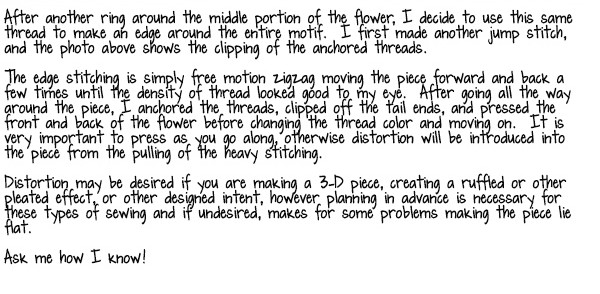
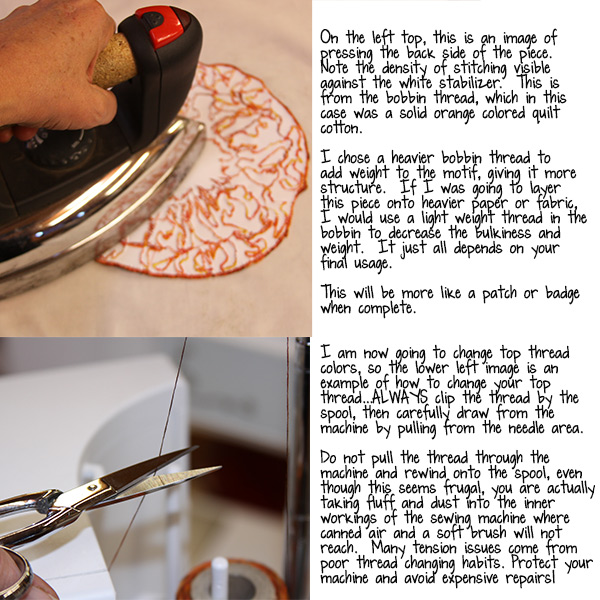
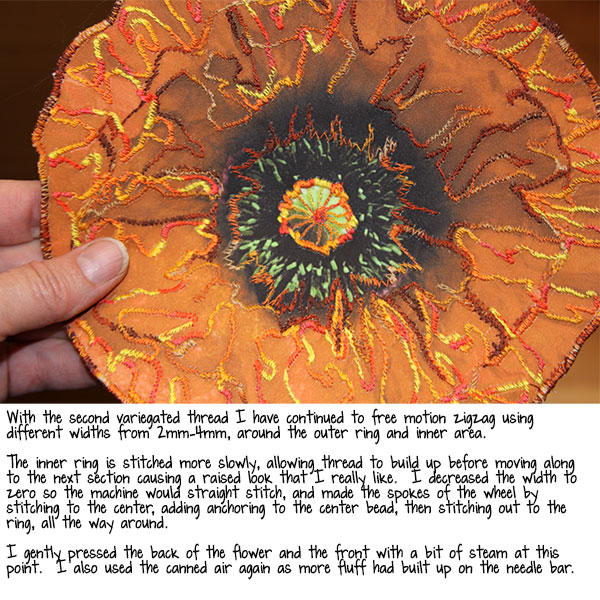
On to the second part of Thread painting, and a closer look at the mechanics of stitching densely.

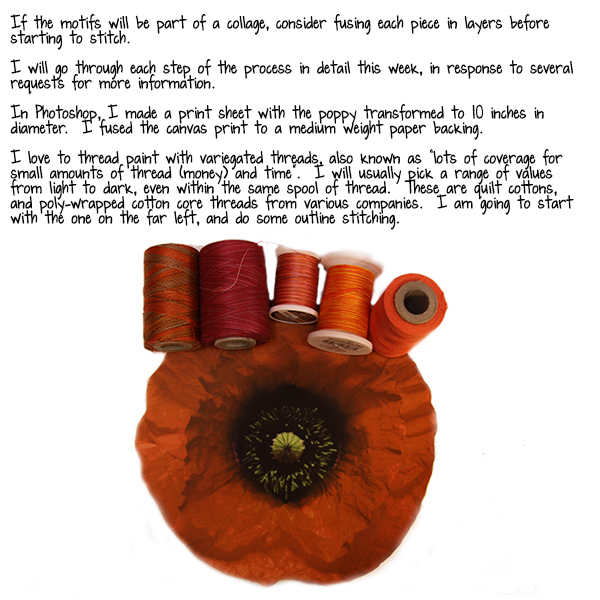
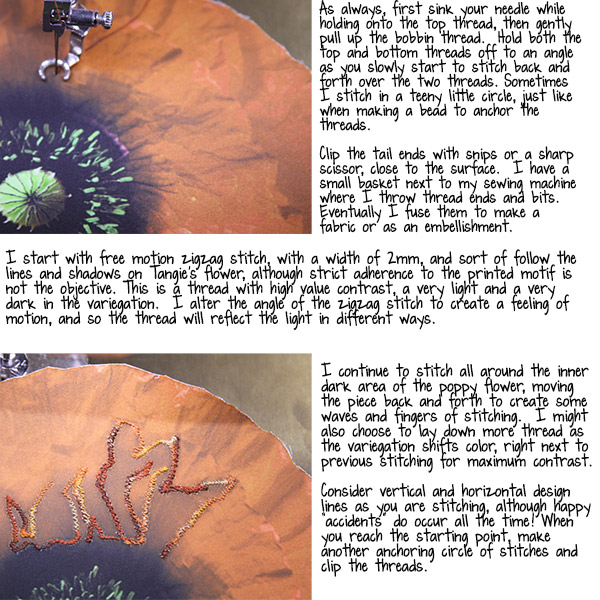
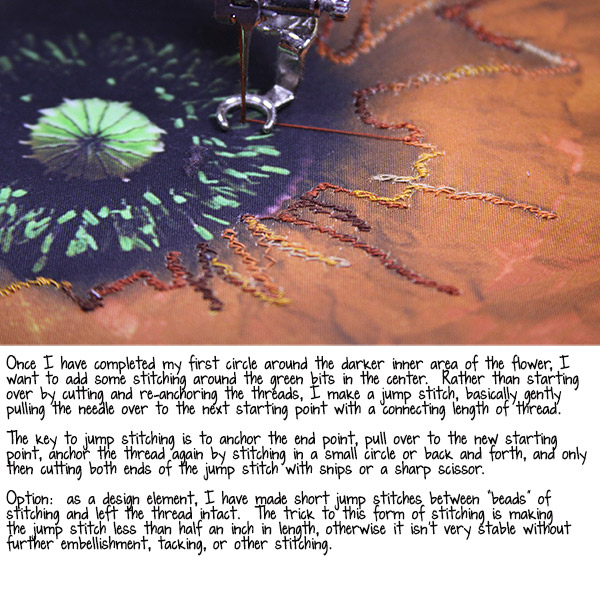
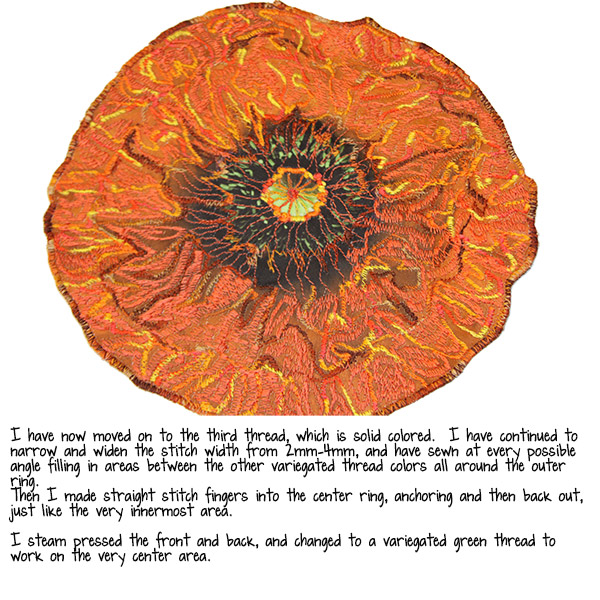
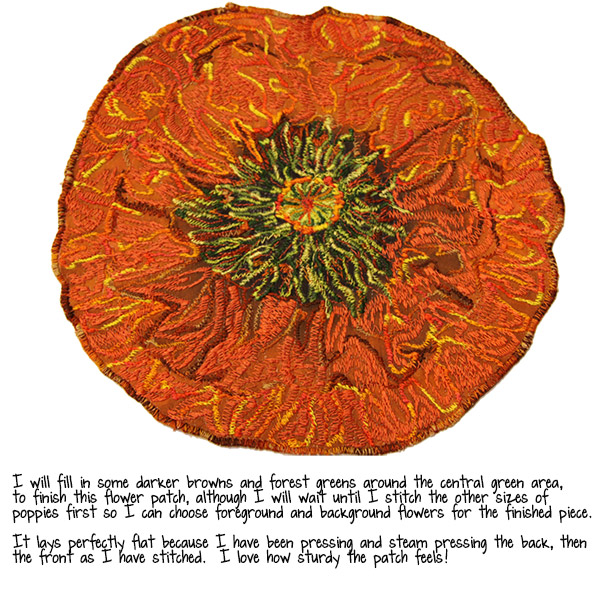
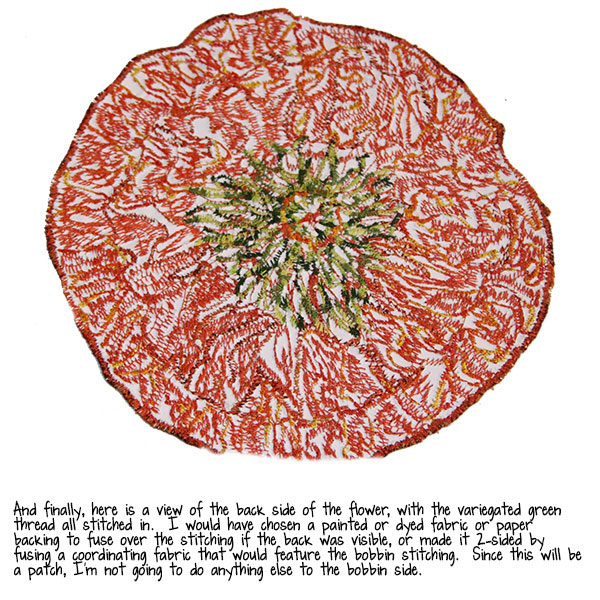
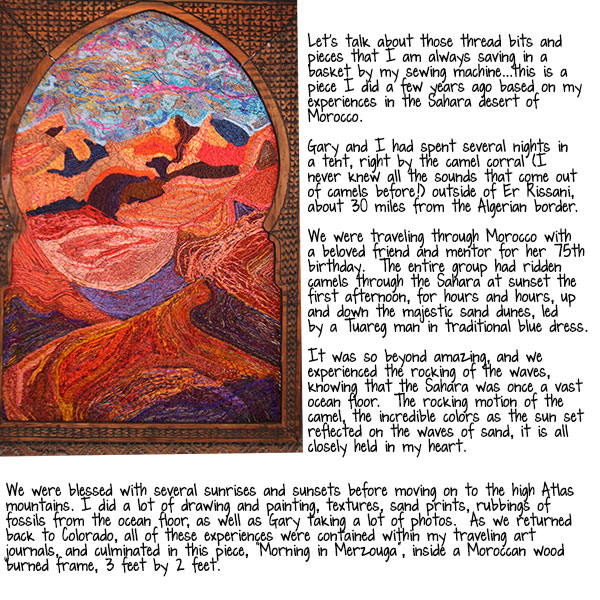
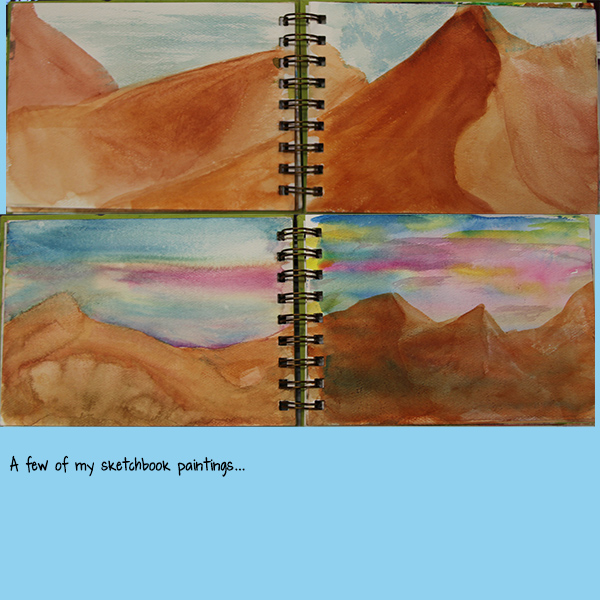
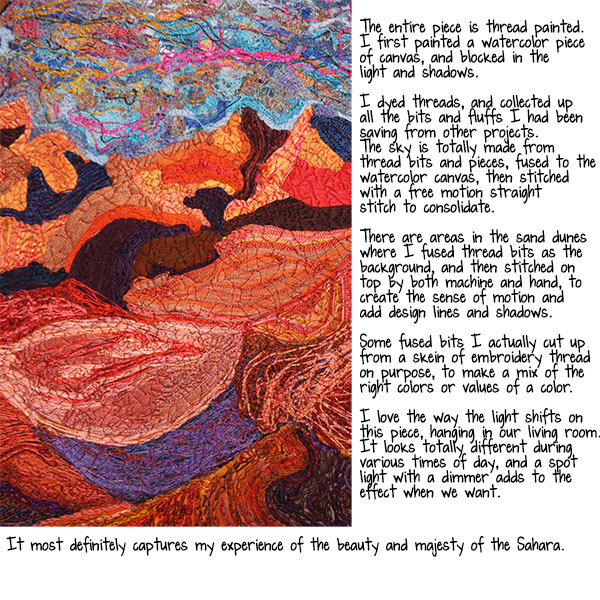
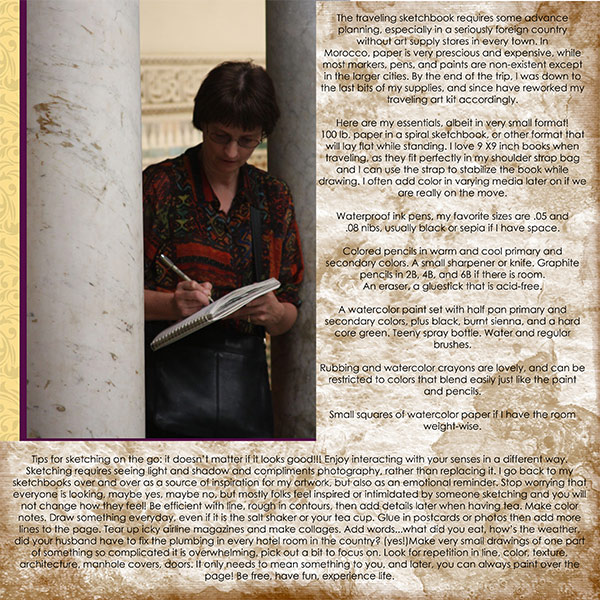
Below is an image from a library slideshow as well as a photobook I made about our trip to Morocco, with tips on the traveling sketchbook:

Please join us next Flashback Friday for another Art Journaling Sewing Lessons installment.
Have a great weekend!
[Posted by: Joy]


Hello artsy friends! It’s time to showcase some of the amazing pieces created by Art Journal Emporium members... Take a peek at this month’s Gallery Gems!
First we have this wonderful marriage of harmony and dissonance brought to us by sbpoet for Tangie Baxter’s Art Journal Caravan Itinerary No. 38. I love the mixture of order and chaos!
 Credits: Tangie Baxter’s Symmetry and Rebecca McMeen’s Mimsy. Fonts are Moksha, Adefebia and AnthologY.
Next up is Marilyn Curttright’s picture perfect mirror-image creation for the AJE September Challenge. I find this visually fascinating!
 Credits: Tangie Baxter’s Symmetry and Rebecca McMeen’s Mimsy & Retro-Mal.
And finally we have Anne Lou (Nan) Robkin’s simply charming take on symmetry, also created for the AJE September Challenge. This sparkler just makes me smile and smile!
 Credits: Tangie Baxter’s Symmetry and Rebecca McMeen’s Mimsy.
Thanks to Sbpoet, Marilyn Curttright and Anne Lou (Nan) Robkin for sharing their wonderful work with us this month. Please leave them some love.
Thanks so much for taking time out of your busy day to stop by and peruse this month’s Gallery Gems!Tangie Baxter & CO’s Art Journal Caravan is going strong and we’d love for you to join us on this adventure!
Don’t forget Monthly Grab Bags are only available for a limited time once a month and priced on a sliding scale. Act fast for the best deal. For more information visit TB&CO Grab Bags.
[Posted by: Glenda]


Welcome to Wednesday and a new featured TB & CO Treasure! The TB&CO Treasures Collection will feature some of our all-time favorite products each week. The ones that you may not have seen before, or maybe they've been on your wish list for a while? These kits and workshops are too good not to share again, so we will be highlighting a few of our staff's picks every Wednesday. The really exciting part is that you can shop each week's selections for 50% OFF the original price! Just use coupon code Treasures50 at checkout.
Here is a peek at this week's featured items:
"Call of the Gypsy"

"Collage Sheet Workshop #16 {October '15 Delivery}"

"ARTist Collage Sheet #903"

Be sure to check back every Wednesday for a new selection! You can always find the Treasures Collection using our "Shop All" button on the store menu.
[Posted by: Joy]

There’s still time for you to participate in the monthly challenge over at the Art Journal Emporium. Just use one of the three ideas provided September Monthly Challenge, create and upload your digital or mixed media entry by September 30, 2016. If you participate in the monthly challenge you could be one of two winners chosen at random – each prize is a $5.00 coupon to Tangie Baxter & CO.
I chose: “2. Inspiration from the Symmetry Definition, 1. the quality of being made up of exactly similar parts facing each other or around an axis.” While it was fun trying to find items that were similar and facing one another, it made my stash into a big ol’ mess. I used Tangie’s collage sheets, rubber stamps, Tombow® markers and doodles to complete this project.
I hope this inspires you to participate and you'll share your work in the AJE classroom to be entered into the drawing.
[Posted by: Jan Nicholas]


