Let's talk about Crafting and The Environment
The big conversation about Climate and change and the Environment is all around. We as crafters can do our part by recycling and using products that are environmentally safe. One such product is Citra-Sol. I love using this for a multitude of things. It's classified a degreaser but it's great for making transfers, cleaning brushes and known best for creating awesome craft papers from old National Geographic magazines. There is something about National Geographic's printing process that works well with this product. A perfect way to help keep it green. Citra-Sol can be purchased at many different stores and even on-line. So next time you need a cool background try Citra-Sol.

Credits:Tangie Baxter's Mint To Be, Rebecca McMeen's Kendra and AJP sheet TB153 which is a free download included in the Art Journal Pockets Workshop
For more information on Art Journal Pockets and the FREE Art Journal Workshop visit Art Journal Pockets- Tangie Baxter & CO.
[posted by Kimberly Moore]
Happy Monday fellow art peeps! Susan here to share a few highlights found while browsing the Art Journal Emporium which is just filled with all kinds of goodness.
Let’s get started with this wonderful collage by Liz using the Challenge Box from the Art Journal Caravan Itinerary No. 10. The cupcake grabbed my attention and then I saw her list. Fabulous take on the challenge.

Credits: Art Journal Caravan Itinerary No. 10 along with digital elements using various digital collections by Tangie Baxter and Rebecca McMeen.
Our second highlight of the week is by Pam. I love how she incorporated a lesson from the March - April book club into a journal page using the quote from the Art Journal Caravan Itinerary No. 10.

Credits: Art Journal Caravan Itinerary No. 10.
Our next bit of goodness is by Robyn who created a found poem using the March Challenge and Goodies and digital supplies by Tangie and Rebecca.

Credits: March Challenge and Goodies, TB& CO's Tangie Bundle 19 & Rebecca Bundle 19, along with Camden and Rootz by Rebecca McMeen.
Thanks so much for joining me this week!.
Tangie Baxter & CO’s Art Journal Caravan is back for 2016 please check it out and join us.
Don’t forget the Monthly Grab Bags are only available for a limited time once a month and priced on a sliding scale. Act fast for the best deal. For more information visit TB&CO Grab Bags.
For more information on the Art Journal Emporium visit Art Journal Emporium - Tangie Baxter & CO.
Wishing you Happy Creating
[Posted by: Susan]
Hello, Katrina here to share with you my cut and paste project for this month using the March collage sheets.
Well, here in England spring is definitely in the air. The garden is full of sunny daffodils, the days are getting longer, the sun is becoming warmer and it even smells like spring! If spring is here then Easter is just around the corner.
When I looked at this month's wonderful collage sheets from Tangie and came across the lovely vintage Easter Bunny I knew I had to make something special with him. So grab your collage sheets and let's make my cute Easter Bunny table decoration.

To make my Easter Bunny table decoration you will need -
- March collage sheets number 3, 5, 7 and 8
- Box template
- White card[board]
- 2 wooden coffee stirrers
- Piece of card[board] from a box
- Scissors, wet glue and a bone folder or something to score with.
This is how we do it -
- Print out your collage sheets.
- Cut out the bunny from the bunny collage sheet as shown and then stick him onto a sheet of white card[board] and cut him out again.

- Stick your 2 wooden coffee stirrers onto the back of your rabbit, cutting them down if you need to. These will give your rabbit stability.

- Then stick him to the white card[board] sheet again and cut him out again.
- Decorate him with glitter highlights and leave him to dry while we make his box and base.
Now make your box -
- Print out my template (size A4), you can print it straight onto your card[board] or onto paper, cut it out and draw around it onto your card[board].

- Cut the box out and then score the lines as shown on the template.
-
Glue the tabs, using wet glue, to the outside of the box. I did it this way because we are going to cover the outside of our box so you won’t see the flaps. The inside will be seen so this way it will look nice and clean.

- Cover the outside of your box using the background collage sheets. I find the easiest way is to apply wet glue to one side of the box. Stick it down onto the back of the collage sheet, smooth it out and cut around with scissors. Repeat on the other sides. The bottom will be stuck to the base so leave that one blank.
- Decorate your box with the eggs from the egg collage sheet.

- Glue your Easter bunny to your box so the bottom of the bunny is level with the base of the box.
Now to make the base -
- Cut a piece of box card[board] the size of the base you want. I haven’t given a size for this as every ones will be different, you might have other embellishments you want to add too. So it's up to you how big you want to make it.
- Stick, using wet glue to the back of one of the background collage sheets and cut out leaving a border as shown, so you can fold it under the base.
- Apply wet glue to the borders and stick down to the bottom of the base.


- Your base is now covered and everything is ready to put together.
- Stick your box and bunny to the base using your wet glue and add a few more of the eggs from the egg collage sheet.
- Fill your box with chocolate eggs and enjoy!

I hope you enjoyed this month’s project. If you have any questions about it ask away I am only too happy to help.
However you celebrate Easter I hope you have a wonderful time.
Love Katrina
Did you know that included in your Art Journal Emporium membership you receive Tangie Baxter's Collage Workshop for that month BEFORE it's released in the TB & CO store? In addtion to the digital downloads there is a video tutorial and sample projects!
For more information on the Art Journal Emporium visit Art Journal Emporium - Tangie Baxter & CO.
[posted by Katrina Rollings]
Last week I posted something new: an in-depth look Inside My Art Journal and all the elements I pulled together to make my latest art journal page. But, believe it or not, that was not my original intention *gasp*. Instead, the project took on a life of its own and my plan was blown to bits... shocking, right? Not. That just about sums up my every day!
Anywho, I love the way the post and the project turned out (especially the challenge of printing digital elements on tissue paper) and as you loyal readers out there may remember, I hinted at the possibility of a tutorial in the near future. Well, have no fear. The future is now.
One of the things I love about creating physical art (as opposed to full-on digital) is the amazing textures that emerge when you play with new mediums, which is why I was so drawn to the concept of using tissue paper. It's super easy to rip and glue and it really gives a unique tactile quality to your art.
The other reason I thought I'd give printing on tissue paper a whirl is that I absolutely adore paint splatters and scatters. TB&CO has some truly unique elements including stamps, collages, and graffiti; and while they look amazing on my computer screen or in a printed collage sheet, it can be tedious if not outright impossible to print and cut these as stand alone elements. Enter the tissue paper.
My reasoning for the experiment was that the the tissue paper should hold the image of the element well, while creating a clear-ish background when glued to the paper surface, thus negating the need to cut out the element.
The project took me a few run-throughs before I got it right, and for a minute there I thought maybe my printer was doomed (though everything worked out in the end). So, quick disclaimer: attempt this project at your own risk!
You will need:
- Tissue paper I used white, I'm sure other colors will work splendidly
- Printer I have an Epson inkjet
- Cardstock any color
- Tape I used plain clear adhesive
- Whatever else you might want to complete your art journal page
The Basics: Tape the tissue paper to the cardstock (please read the whole post before you attempt). Run the taped cardstock through your printer. Remove the tissue paper, use as you like!
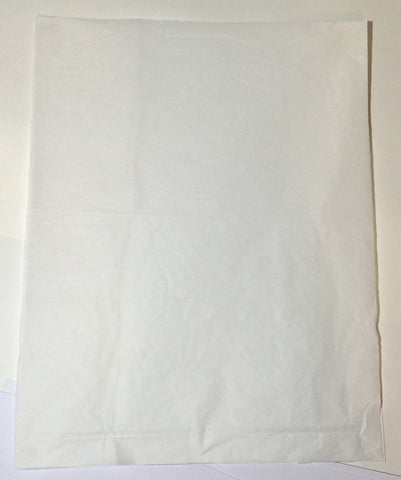
Take one: Here's where I made my first mistake. The first time through I only taped the paper to the corners of the cardstock, reasoning that I didn't want to rip the tissue paper when I removed it after printing.
This did not work.
The printer gripped to the tissue paper, not the cardstock, and almost jammed the printer. Chalk it up to a learning experience.
Take two: I taped the tissue paper to the top and bottom of the cardstock, using a generous amount of adhesive.
Again, failure.
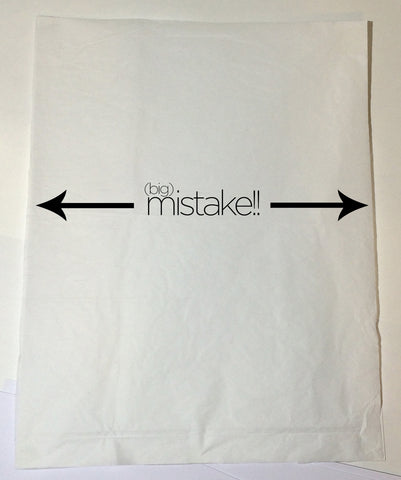
The printer gripped just the tissue paper more voraciously than before. This time it chomped the tissue paper into pieces. It was no picnic to pluck out, but everything was removable in the end. No worries, I had a ton of tissue paper to play with.
Take three: I taped the tissue paper to the cardstock all around the edges. This time I was less worried about ripping the paper in the end than I was with the printer eating it for a third time, so I was generous with the tape.
Voila! It finally worked. The printer gripped both the cardstock and the tissue paper together and printed the lovely image you see below. If I were to try the project again I might try a combination of tape and spray adhesive to ensure the tissue paper was firmly planted to the cardstock.
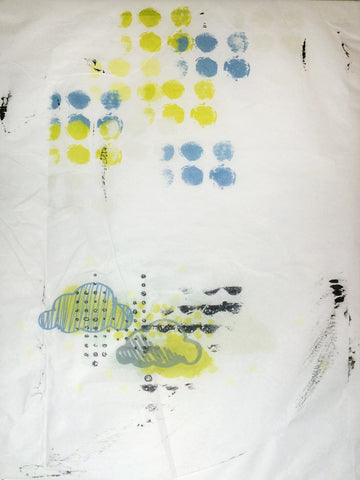
[Credits: TB&CO Grab Bag #19, now available as separate kits, Tangie Bundle No. 19, Rebecca Bundle No. 19 ]

The ink got a little sloppy, as you can see. But you know what? This is art journaling! There's no such thing as sloppy!
I trimmed up the printed elements and glued them to some beautiful digital papers in my art journal added some more glorious embellishments, and doodles, and I have to say, I am quite pleased with the way it came out. The final product:
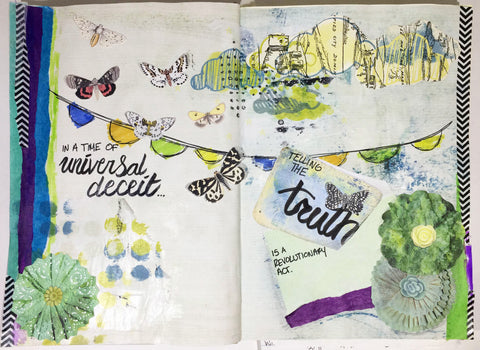
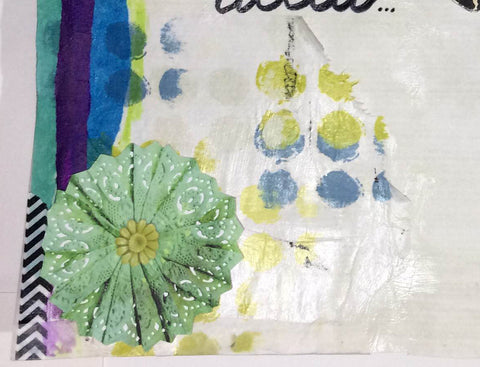
Here are a few close-ups of the tissue paper printed elements. I love how it just blends right in with the background:
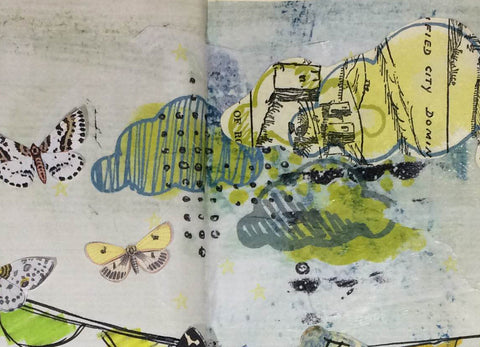
The second piece has a bit of a gloss to it that I didn't anticipate, but I suspect it had to do with the glue that I used. If you are looking for a more matte effect I would avoid glossy finish glue.
Thanks for stopping by and checking out my latest adventure in the world of art journaling. What techniques are you using right now to keep things fresh and fun? Leave us a comment below!
Don’t forget Monthly Grab Bags are only available for a limited time once a month and priced on a sliding scale. Act fast for the best deal. For more information visit TB&CO Grab Bags.
For more information on the Art Journal Emporium visit Art Journal Emporium - Tangie Baxter & CO.
[Posted by Karli-Marie]
This month’s challenges are Doodles and Lucky. The team has been very creative this month and have interchanged some of the free sheets included on the Free Art Journal Pockets Workshop. There might be a leprechaun changing the challenge pages at night when we are asleep. Make sure you check out the original free pages to see what I mean. You can find the "Doodles" and "Lucky" in the Challenge classrooms.
Doodles Challenge:
Annette used the “Lucky” free sheet and changed it into the “Doodle” challenge by using a black sharpie and acrylic markers. Her doodles make the words pop off of the page.

Lucky Challenge:
Zeneva took the “Doodle” free sheet and changed it for the “Lucky” challenge.

Zeneva's credits: Rebecca McMeen's Beetris, Tangie Baxter's Up Up & Away and AJP Starter Kit, The Nifty Pixel's Cosmo Bloom (flower) and It's The Little Things (leaves).
I told you we might have a leprechaun visiting Art Journal Pockets this month.
For more information on Art Journal Pockets and the FREE Art Journal Workshop visit Art Journal Pockets- Tangie Baxter & CO.
[posted by Terri Paulson-Sasaki]
Hello artsy friends! Glenda here to share with you this week’s sparkling Art Journal Emporium Gallery Gems!
Let’s jump right in with Jeanet’s gorgeous response to the AJE’s March Challenge. I love how she combined one of her own original paintings and goods from the March Grab Bag to highlight some wonderful “found poetry”!

Credits: Tangie Baxter & CO’s March Grab Bag
Next we have Sharon’s heartwarming contribution to the Art Journal Caravan Itinerary No. 9. There is something simply magical about the dog’s eyes - something that makes me feel right at home!

Credits: All elements from Tangie Baxter & CO.
And finally we have this wonderful page created by Rosie for the March Challenge. I just adore the button flowers and visual whimsy accompanied by the thought-provoking quote!

Credits: TB & CO March Grab Bag as well as fonts Sheffre Omega, Bring Me the Gummi Bears, Alphabits Squared, Embossing Tape 1 BRK, & Quiet Evening.
Special thanks to Jeanet, Sharon Brogan and Rosie Funnell for sharing their amazing artwork! Please leave them some love!
Tangie Baxter & CO’s Art Journal Caravan is back for 2016 please check it out and join us.
Don’t forget Monthly Grab Bags are only available for a limited time once a month and priced on a sliding scale. Act fast for the best deal. For more information visit TB&CO Grab Bags.
For more information on the Art Journal Emporium visit Art Journal Emporium - Tangie Baxter & CO.
See you soon! Happy Creating!
[Posted by: Glenda Mulac]
My sister and niece both have birthdays in March, right around St. Patrick’s Day, so I thought it would be nice to send them a set of Art Journal Pockets. My sister is an art teacher and my niece loves anything artistic as well so this will make a great gift for both!
Materials:
- Tangie Baxter & Co. AJP Sheet No. TB153
- Paper Cutter
- Alphabet Stickers
- Washi Tape
- Random bits and bobs from your stash
First, I chose the beautiful AJP sheet TB153 which is a free download included in the Art Journal Pockets Workshop which is also free. It has lovely patterns and colors to work with and green represents March and spring. Second, I cut the pieces and arranged them in a way that looked good to me. Aren’t they beautiful?


Next, I raided my stash to find some things that would go well with the patterns and colors on the AJPs. I chose gold letters and embellishments, some blue and some green embellishments. Then, I arranged the letters on the AJPs. Beautiful!

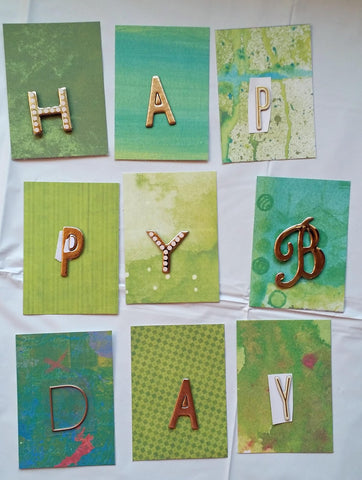
After that, I auditioned each embellishment on the AJPs to see how I wanted them organized. I took the pieces that made the cut and decided to add some washi tape. Here are what my Art Journal Pockets look like after they are arranged. I just love the colors!
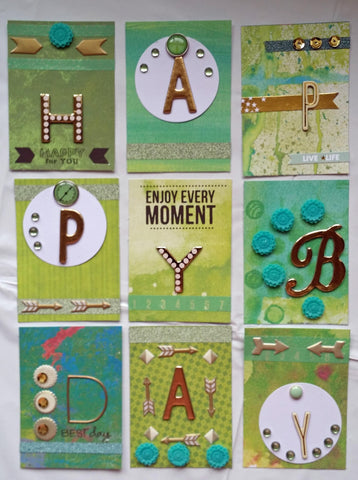
For more information on Art Journal Pockets and the FREE Art Journal Workshop visit Art Journal Pockets- Tangie Baxter & CO.
[posted by
Jessica Ann Lane Massingill]
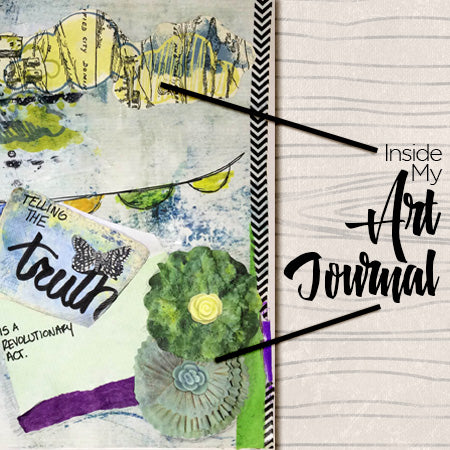
Is a picture really worth 1,000 words? This week, I'm gonna zip my lip and instead of the usual tutorial or soul-searching post, I thought I'd let my art journal do most of the talking.
Inspired by Tangie's latest Grab Bag goodies, I started my art journal adventure this week with some tissue paper, washi tape, fantastic digital elements, and a printer. As usual, the project took an unexpected turn here and there and the end product was nowhere near what I had in mind when I started... but the process was everything I hoped it would be.
Without further adieu, here's a look inside my art journal:
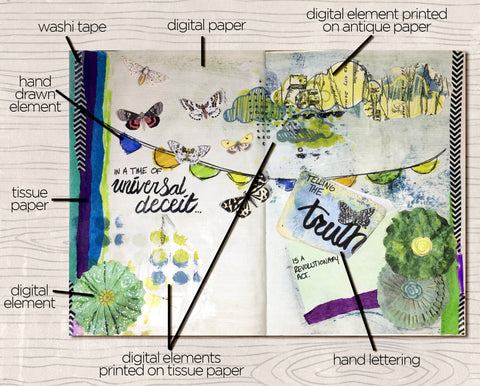
My most fun/biggest challenge with this project was the process of printing on tissue paper. It was an interesting undertaking, one I'd like to play more with in the coming weeks... do I sense a tutorial in the near future?
Do you have any suggestions for blog topics or tutorials you'd like to see? Leave a comment below and let us know!
Don’t forget Monthly Grab Bags are only available for a limited time once a month and priced on a sliding scale. Act fast for the best deal. For more information visit TB&CO Grab Bags.
For more information on the Art Journal Emporium visit Art Journal Emporium - Tangie Baxter & CO.
[posted by Karli-Marie]
Hey there, Carolyn here, taking over the TB&CO blog again to tell you about the March/April Book club that just got rolling over at the Art Journal Emporium. We’ve got another great book selection for you for this term.
Susan is your host and she chose Mixed Media Techniques for Art Journaling: A Workbook of Collage, Transfers and More by Kristy Conlin

I’m really excited to dive into this book (discussions are posted every Friday). If you’re not already a member of the Art Journal Emporium this may be just the thing to convince you to give it a try. If you have any questions please leave them in the comments section below. Hope to see you in the Book Club!!
For more information on the Art Journal Emporium visit Art Journal Emporium - Tangie Baxter & CO.
[Posted by Carolyn Albro]
Greetings friends! It’s Monday which means it’s time to take a look at some of the goodness showing up in the Art Journal Emporium Gallery.
Let’s start this week’s highlights with Zeneva’s wonderfully, quirky page made from the Color Prompt Challenge and Itinerary quote.

Credits: AJC Itinerary No. 6; Tangie Baxter's Spinning DayDreams, Mint To Be, Sweet Harmony, Bountiful; Rebecca McMeen's Illy, Lyne, Retro Mal and The Nifty Pixel's Pick Your Destiny Alpha.
Liz is up next with this bit of goodness. I love the collage effect of her page.

Liz’s credits: AJC Itinerary No. 8 and the March 2016 Grab Bag.
Anne Lou’s Frida tribute is filled with rich, vibrant colors and wonderful blending. I love the quote too.

Anne Lou’s credits: Inspired by the Art Journal Caravan Itinerary No. 8.
Jenny is our last highlight of the week using the March Grab Bag. I love the choice of elements and placement on her page. Everything works wonderful together. I could see this framed and hanging on a wall.

Jenny’s credits: Art Journal Caravan Itinerary No. 9; March Grab Bag; Font is Tangie Baxter's Bread and Butter .
I so hope you enjoyed today’s selections! A big thank you to Zeneva, Liz, Anne Lou and Jenny for sharing their wonderful creations with everyone. Please leave them some love!
Tangie Baxter & CO’s Art Journal Caravan is back for 2016 please check it out and join us. The Art Journal Caravan is where I discovered and fell in love with art journaling using all digital supplies and eventually branched out to mixed media.
Don’t forget Monthly Grab Bags are only available for a limited time once a month and priced on a sliding scale. Act fast for the best deal. For more information visit TB&CO Grab Bags.
For more information on the Art Journal Emporium visit Art Journal Emporium - Tangie Baxter & CO.
Thanks so much for looking - see you soon with more outstanding AJE Gems.
[posted by Susan Mccarley]


