Hello and welcome to my special Christmas post. My name is Katrina Rollings I'm from England and I am a member of the Creative Crew. I love my mixed media and using digital kits for all kinds of creative things.
I love planners but I don't really have a life that needs a planner. There are a couple of exceptions though, holidays - I always make a themed journal for each holiday, which I write each day and collect all those little bits and bobs you pick up on your travels and of course Christmas!
I have used a Christmas planner for many years now, bringing it out year after year and adding to the lists. I thought it was such a useful thing I would make myself a new one and share it with you.

Tangie has so many wonderful Christmas kits it was so hard to pick. In the end I chose
Artist Trading Cards Super Saver {Bundle No. 2} - hundreds of beautifully vintage images, perfect to use in your planner.
Letter Size Paper Pack No. 1 - how did I miss this one! Full of wonderful papers for the whole year. An absolute must.
Quickity Split Refill {Joyous Noel Collection} - Wonderful print and use papers for Christmas projects.
To make your planner you will need -
* stiff card for your planner covers cut to the size you want your journal to be. Mine is A5 which is British A4 cut in half but feel free to make yours which ever size you want.
* Printable card and paper
* Coloured card to make your dividers.
* Ribbon for your closure.
* 3 book rings to hold the planner together. I like to use book rings here as you can open them and move things around or add things to your planner when you want to.
* An envelope template or an old envelope you can take apart and use as a template.
* Copy paper for your pages cut to size.
* Ribbon, bells, buttons, trims or any other embellishments you want to add to your planner.
* Wet glue, scissors and hole punch
So now we have everything to hand let's make our planner.....
To start with you need to decide how many parts you want your planner to have, I have decided on 3, Christmas card list, present list and Christmas recipes.
The next decision is which papers you want to print. You will need-
* A front and back cover
* 2 others for the inside of the planner covers
* 3 printed onto printable card for the envelopes and 2 more for the pockets on the dividers.
I printed out the papers I liked

Before you cover your planner covers with your paper you need to attach your ribbon to the cover base's. I used a strong double sided tape. Line up the covers next to each other to make sure you put the ribbon in the same place on the front and back cover. The ribbon needs to go on the outside of each cover.

Then I covered the cover's of my planner on both sides with the papers.
Use a wet glue to do this as it will give you a little wriggle room to get your papers in the right place. Don't use too much glue or this will wrinkle your papers, if you can see it on the base you have too much.
If you want to have a particular part of the paper on your cover, like the stockings on my cover, hold it up to the light and you will be able to see the cover through the paper. That will help you position it.
Once the paper is stuck down trim the paper to size. This is much easier than cutting the paper to size first, believe me that always leads to disaster.
I then used some red paint to colour the edges.

I then cut the coloured card to the size of my planner to make the dividers.

I used the leftover strips of paper from covering my planner covers to make pockets on the dividers. I also used one of my cutting dies to make tabs for my dividers.

On the other side of my dividers I made some envelopes using the printed card sheets. I had an envelope template but if you don't have one of these you could unstick an envelope you have and draw around it of just draw one free hand yourself.

Keeping the envelope theme going I also made some more envelopes to go in each section. After all you can never have too many pockets!!
I used off cuts again to put a small piece of contrasting paper on the inside of the envelope to cover up the white that was showing.
Then I needed to punch the holes for the book rings to go through to hold my planner together. All the holes need to be in the same place on all the sections for the planner to look nice and square.
I have a trick to help with this...

Cut a piece of scrap paper so it is the same height as your planner.

Fold your piece of paper as shown in the photo. This will be your punching template. Then draw a line vertically on the out side of the template to make sure all the holes are the same distance from the side of the planner. Punch 3 holes on the crossing of the lines.

I then placed my template on the covers and punched the holes through the holes on the template.
If you find it hard to hold the template onto the cover you can use a peg or bulldog clip to hold it onto the cover or draw a dot with a pen through the template and the punch your holes.
I then did the same with my dividers and my envelopes.

For the paper pages I used the same template but held the papers together with clips to make it easier.

When I put my planner together all the holes lined up.
I could then add my book rings to hold it all together.
Now for the fun part, decorating your planner.
The kit I chose, Artist Trading Cards super saver has lots and lots of beautiful vintage Christmas images. I went through and chose the ones I liked, re-sized them and printed them and cut them out.
This is how I decorated mine -
My cover, I used die cut letters for my planner name and then decorated my book rings with ribbons and bells.
The buttons are attached to the book rings with wire and I also used a button on the cover too. I have added some sparkle using a Sakura clear glitter pen.
Tip don't put anything too bulky on your planner cover. This will be used year after year and you don't want things being knocked off over the years.

The first page - I loved this happy Father Christmas so I put him right at the front so he was the first thing you see.
Also the wonderful bow! I added a tag to it so I could add the date that I made my planner.

My first divider - I added the beautiful tree adding some of the glitter pen.
Dont forget to use you tapes too.
This will be my Christmas card list section. Here in the U.K. we send lots of cards that we display around our homes. Your list doesn't tend to change much over the years but it's nice to know you have remembered everyone.

The other side of the divider - Those bells look so real on the pocket there. I also added some Washi tape.

Divider 2 - This will be for my present lists each year. Here I just added some tape as I liked the busy paper pattern.

For the reverse, I added this very full stocking and bell images as well as a word cut with one of my dies. This pocket will be a great place to keep all those precious gift receipts, just in case!

My second envelope - This is decorated with this wonderful vintage image along with the word strip. Perhaps the place to keep those handmade tags you have left over each year?

Divider 3 - This will be my Christmas recipe section. I love to cook and bake and have lots of recipes I use each year but they are all in different books or on pieces of paper. So now I can put then all in one place, here.
I love this bulldog clip holding the papers, all from the Tangie's bumper ATC kit. I also decorated the back of the envelope.

The reverse of the divider - I added some more of my die cuts and some sweet little flowers also from the ATC kit. Perhaps a pocket for recipes people have written out for you and you want to keep the original safe?

The last envelope - The beautiful bow is from the ATC kit with the leaping deer which is a die cut

The back cover - I added the Christmas stocking, again from the ATC kit. The fun bobbly trim I added to the front and back covers.

Then finally the back cover.
Well thank you so much for staying with me to the end, that was a long tutorial but I do hope you will make a Christmas planner of your own. They really are handy and it is lovely looking back over the lists of Christmas presents you have bought in the past.
Of course this could be a planner for anything really, just decorate appropriately. One would also make a lovely Christmas gift too.
This is something that you can use year after year but just one last tip - don't put it away with the Christmas decorations, keep it in a safe place ready to go each year so you can be really organised year after year!!
Thank you again for reading my tutorial, if you have any questions or queries about the planner tutorial please ask below and I will try and help.
Until my next post, enjoy the build up to Christmas.
Love Katrina
Happy December, this is the last grab bag of 2016! It's $6 for 24 hours only so get it while you can at this price! This grab bag goes with our Art Journal Emporium December theme "Release" and contains six packages of digital supplies.
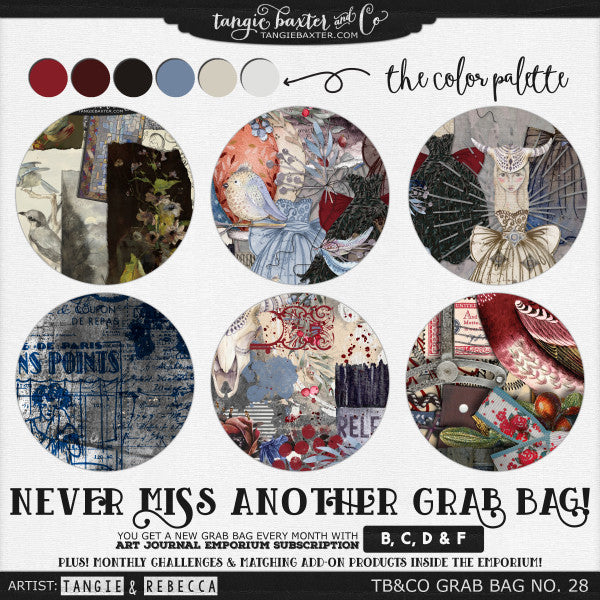
TB&CO Grab Bags are available on a sliding scale so act fast for the best deal! If you are FAST you can get the grab bag for only $6 the first 24 hours.
The grab bag then goes up by $1 each day.
$7 the next day (we will reveal full previews on this day)
$8 the next day
$9 the next day
$10 the next day
Then it will be broken up into our individual stores for FULL PRICE. Never miss another grab bag at the $6 price! You can purchase a subscription, where you automatically get the grab bag every month at the $6 price! (If you purchase a new subscription which includes grab bags any time in December 2016 you will get the December 2016 grab bag even if it is no longer available to the public!).


[Posted by: Stacy]
 Welcome to December! This week we are offering some of our favorite Christmas kits from years past at half price!
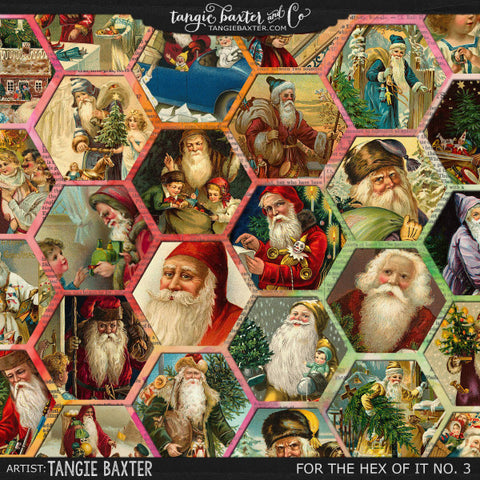
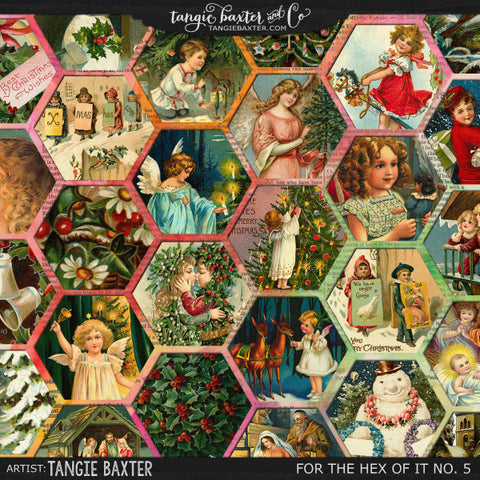
The TB&CO Treasures Collection features some of our all-time favorite products each week. The ones that you may not have seen before, or maybe they've been on your wish list for a while? These kits and workshops are too good not to share again, so we will be highlighting a few of our staff's picks every Wednesday. The really exciting part is that you can shop each week's selections for 50% OFF the original price! Just use coupon code Treasures50 at checkout.
-Collage Sheet Workshop #06 {Dec '14 Delivery}
For the Hex of It No. 3
For the Hex of It No. 5
Be sure to check back every Wednesday for a new selection! You can always find the Treasures Collection using our "Shop All" button on the store menu.
[Posted by: Stacy]

Art Journal Emporium November Gallery Gems
Good day artsy friends! It’s the most wonderful time of the year - er, month - so let’s take a look at a few sparkling Gallery Gems from November’s Art Journal Emporium!
First we have this gorgeous submission created by Laura for the AJE November Challenge. Truly a soft but insistent feast for the eyes!

Credits: Tangie Baxter’s Magnify and the Magnify Bonus.
Also in response to the November Challenge, we are treated to this wonderful page from sbpoet. The Aldous Huxley poem she has chosen is absolutely perfect for the theme “Magnify.”

Credits: Tangie Baxter’s Magnify. Word art fonts: Adefebia Free Font, DecoCaps, VTPortableRemington, Witless, and Before the Rain.
And finally, using prompts from AJE Itinerary 44, Marilyn gifts us a whimsical piece sure to bring a smile.

Credits: Tangie Baxter’s Magnify, Figment, and Sweet Harmony. Rebecca McMeen’s Ridley. Origami pieces by Sara 876 at DeviantArt.
A BIG Thanks to Laura, sbpoet and Marilyn for sharing their wonderful work with us this month. Please leave them some love.
And thanks to you for taking time out of your busy day to stop by and peruse this month’s Gallery Gems! Tangie Baxter & CO’s Art Journal Caravan is going strong and we’d love for you to join us on this adventure!
[Posted by: Glenda]
Just a gentle reminder to Emporium members, don’t forget to participate in the monthly challenge over at the Art Journal Emporium! Use one of the three ideas provided in the November Monthly Challenge, create and upload your digital or mixed media entry by November 30, 2016. If you participate in the monthly challenge you could be one of two winners chosen at random – each prize is a $5.00 coupon to Tangie Baxter & Co.
I chose: #1 "You gotta dig a little deeper, to find out who you are!" I love this song from Disney's Princess and the Frog. Use the phrase, the movie or the song lyrics to create an art journal page.
Like Tangie, I love this song and Disney’s Princess and the Frog. Since I have just been working on drawing animals (I lean towards cute, instead of realistic) - I drew this frog, added a border from this month’s Collage Sheets, and some doodles.

I hope this inspires you to participate. Not a member yet? Join us with a subscription to the Art Journal Emporium!
[Posted by: Jan Nicholas]

Hello, my name is Katrina Rollings and I am part of Tangie's Art Journal Emporium Crew. Thank you for joining me for my November mixed media project.
For my journal page today I am using one of the collage sheets included in the Art Journal Emporium's November collage sheet pack.
Now I love to collage and make up my own painted backgrounds, and if you are reading this you are probably the same. Sometimes though, a collage sheet just catches your eye and you have to use it, and that is what happened this month. I love the collage sheet I have used and just had to make a page with it.
The first thing I did was print it out.

I work in a square journal and had to cut it down to fit.

Next, I got out my favorite water soluble crayons and colored in here and there, just had fun with it.

I wanted to add some text, but because of the wax crayon I would find it difficult to use my pens, so I decided to type it out and then cut it up into strips.

Then all I had to do is stick them onto the page.

I added some of the crayon around the strips and my page was finished.
It's nice sometimes to do something different and I really enjoyed making this simple page. I love this collage sheet and am so glad I chose to follow my heart!
I hope you enjoyed this walk through of my page. If you did, I will be here again next month with another mixed media project using Tangie's wonderful products. Odds are there will be sleigh bells ringing in the background for my next project!! Until then, stay warm, love Katrina.
[Posted by: Katrina Rollings]

Welcome to Wednesday and a new featured TB & CO Treasure! The TB&CO Treasures Collection features some of our all-time favorite products each week. The ones that you may not have seen before, or maybe they've been on your wish list for a while? These kits and workshops are too good not to share again, so we will be highlighting a few of our staff's picks every Wednesday. The really exciting part is that you can shop each week's selections for 50% OFF the original price! Just use coupon code Treasures50 at checkout.
Just in time for the holiday shopping season, this week you can get some of Tangie's most popular online workshops at half price! These classes make wonderful gifts--just let us know if we should send the classroom invitation to an email address other than your own in the order notes at checkout.


There are some festive ARTist Collage Sheets on sale too! Hop on over to the TB&CO Treasures Collection for this week's bargains.
Be sure to check back every Wednesday for a new selection! You can always find the Treasures Collection using our "Shop All" button on the store menu.
[Posted by: Stacy]
This wreath was created to celebrate the Autumn (falling leaves) season. I used papers from Tangie Baxter & CO – Tangie Baxter’s “Halloween Magic", “Spinning Daydreams”, “Abounding” and Rebecca McMeen’s “Crispin.”
1. Create a mask of a leaf.

2. For each of the papers (I used 24 different papers) cut out the leaves. Make sure that the connecting piece is sturdy as this will be used to attach the leaves to the frame.
 3. Either purchase a circular frame or make one (I used pipe cleaners, connected and braided to create a flexible, circular frame).
4. Fold leaves evenly over frame (for the 9” diameter frame, used 8 leaves). Use paper clips to hold in place temporarily.

5. Fold leaves over between the previous row of leaves (again for the 9” diameter frame, used 8 leaves). Staple at base of each leaf to hold in place. Also glue the ends of leaves together.

6. Cut leaves in half (you will be using only one half of the leaf pattern for the next row). Fold the leaf about ¼ way up from the bottom and place around the frame to form the third row. Glue down leaf on the front of the wreath and tape down on the back side (use heavy duty tape).

7. Use heavy thread or thin wire to form a hanger (I used waxed linen thread). Ta! Da! You now have a super cool wreath to hand on your door. Add glitter if you want (might be a fun addition – there’s always room for glitter).

I hope you enjoyed this mini tutorial on making a Thanksgiving Wreath. Wishing you a holiday season full of joy.
"{Tangie Bundle No. 14} Spinning Daydreams"

"Abounding"

"Halloween Magic"

[Posted by:Jan Nicholas]

A few years back we had a feature called "Art Travels with Rain". Please note these may be altered from the original posts to update links, provide information on newer programs, etc.
Enjoy!

Hello fellow Art Travelers!
Oh it has been a long time since we last spoke…I have had the sad notebook computer repair tale going on for far too long. The repair quote was two weeks, I gave it 6 before my trip, and now I’m home and it is 13 weeks later without the repair done! Hence, three posts in one today! I hope nothing on the blog melts from all these photos.
Just in case you are wondering…yes, my beautiful and perfect grandson, Danny the third, is now almost 5 months old. Ok, one photo for the Grandma over here and then onto printing blocks:
This is Jessica and the baby taken on Maui and for all you photographers out there, an exercise in closing down curtains in mid-day, bouncing the light off a reflector (white pillowcase at the condo) into the mirror to get the lovely catchlights in Mom’s eyes.

Ok, one more: This is a black and white conversion I did for a class exercise

And on to the topic at hand: Making Printing Blocks
I love to print with fabric paints, thickened dyes, or acrylics on various papers and fabrics. I also enjoy making rubbings on top of the print blocks, then flooding with ink, watercolor, or pencil for an entirely different look. Tangie has a wonderful batch of print blocks for sale that I adore, and use often. These lessons will give you some ideas on how to design and make your own. In the future, I will give you all some of my favorite block cuttings tips and tricks, and also explore the various art media I like to print with. So for now…on to some design considerations!
I tend to explore themes, using art and design, then on to stitch or some of type of mixed media interpretation. For example, here is a 2 page spread of collaged photographs on star and cross motifs:

I will often make collages of my own or found photographic images when exploring a theme, or trying out a color scheme, then I will doodle, draw, trace, or otherwise check out shapes I am attracted to.
Here’s an example of one of my sketchbooks:

Once I identify a shape, I will trace or photocopy the motif, and add black marker to darken if necessary.

I will also use the enlarge/reduce function on the copier to explore scale:

Now the fun really starts! I sometimes can identify a smaller component of the shape that tickles my design eye right off, other times I will fold and cut or divide and cut and just see what I can get. I will also occasionally use a small open frame to isolate shapes within the “mother” shape.

Once I find a shape I like, I will play around with various patterns: linear, half-drop, etc., and make new shapes with the one component, all with photocopies.


 I will also go back to my sketchbook drawings for further pattern ideas:

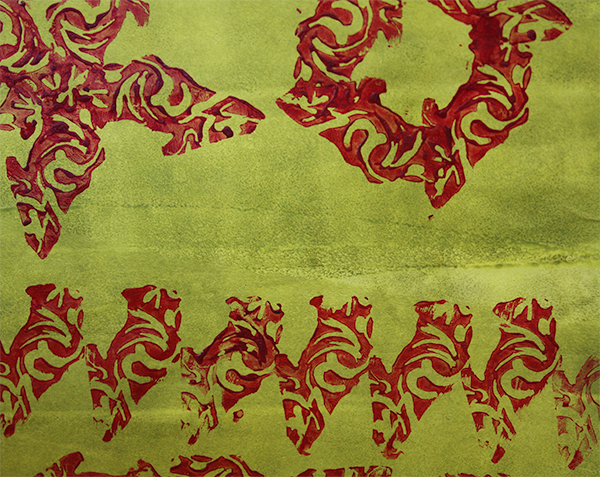
Here are a few pages of acrylic paint and thickened dye prints using the blocks I made from the designs above:


Below is an image of one of my big sketchbooks showing some of the tracing and photocopies attached to the pages with the original inspirational photograph…it might be a long time before I ever make a stencil or print block, but all the design work is done and safe in the sketchbook.

I will often trace in pencil and then start removing lines to simplify the design for a print block:

Some drawings before I cut the block, mostly to know what to remove vs. leave, the positive printing raised surface vs. the negative space.

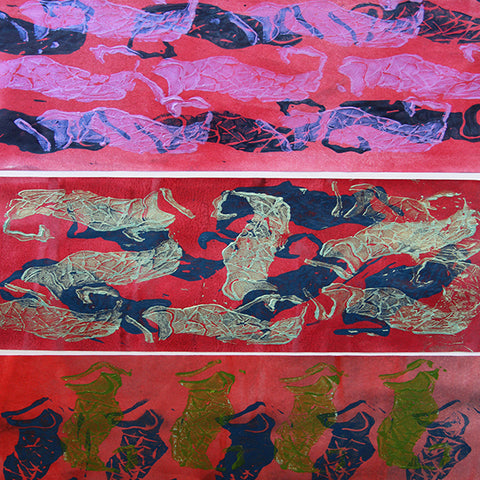
And here are some images of the above blocks in action.


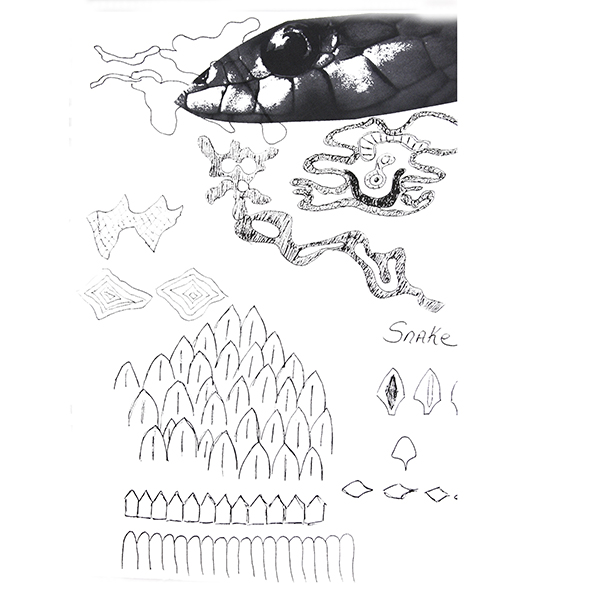
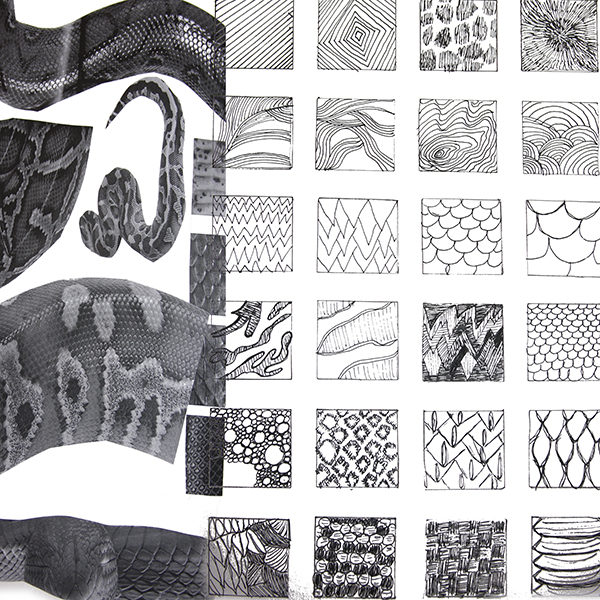
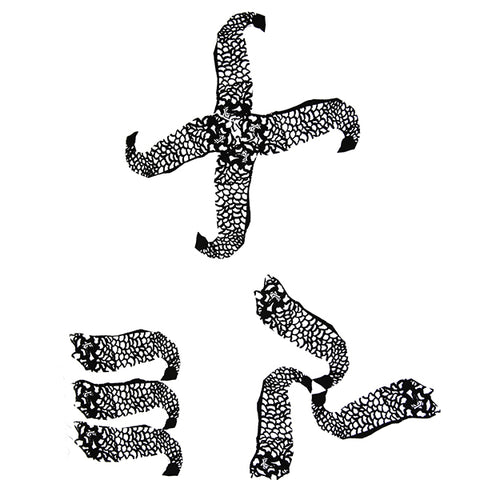
I will often take an animal or reptile or other living creature that is highly patterned or textured and extract line patterns in my sketchbook as a design exercise for stencils and print blocks. Here are some examples of snake skin and peacocks:


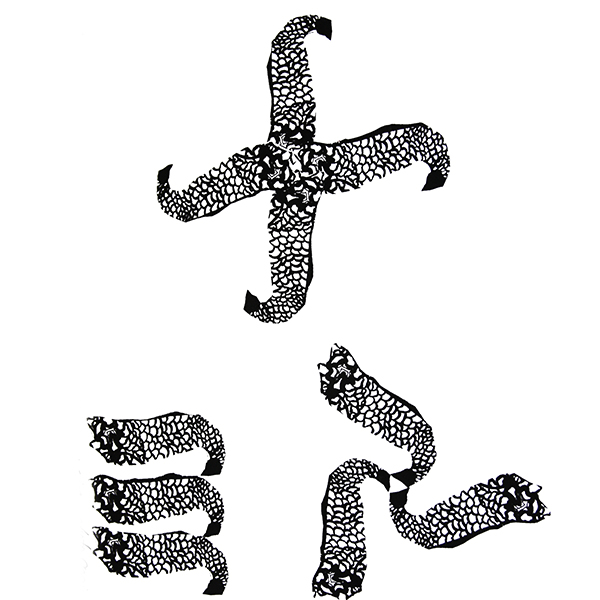
Once I cut the block, I will make a black on white paper print for my block inventory…it is easier for me to visualize if I see it printed on paper, rather than in the reverse on the block.

That was a pretty messy example!
Here are a couple of images using the blocks into molding paste, tar gel, or other raised gel medium over a painted and printed surface:


Finally, in my design sketchbook, I do keep a record of bits of printing, along with the fabrics, paints, papers, or whatever I used. Here is an image of one of my City and Guilds documentation spreads with these blocks:

Until next time, I hope you find some time to make some art!
take care,
Rain
~~~~~
Please join us next Flashback Friday as we continue our journey with Rain.
Have a great weekend and Happy New Year!
[Posted by: Joy]
Welcome to Wednesday and a new featured TB & CO Treasure! The TB&CO Treasures Collection will feature some of our all-time favorite products each week. The ones that you may not have seen before, or maybe they've been on your wish list for a while? These kits and workshops are too good not to share again, so we will be highlighting a few of our staff's picks every Wednesday. The really exciting part is that you can shop each week's selections for 50% OFF the original price! Just use coupon code Treasures50 at checkout.
Here is a peek at this week's featured items:
"Journal Anthology No. 01"

"Journal Anthology No. 02"

"Journal Anthology No. 03"

"Journal Anthology No. 04"

"Journal Anthology No. 05"

"Journal Anthology No. 06"

"Journal Anthology No. 07"

"Journal Anthology No. 08"

"Journal Anthology No. 09"

"Journal Anthology No. 10"

"Journal Anthology No. 11"

Be sure to check back every Wednesday for a new selection! You can always find the Treasures Collection using our "Shop All" button on the store menu.
[Posted by: Joy]


 3. Either purchase a circular frame or make one (I used pipe cleaners, connected and braided to create a flexible, circular frame).