Flashback Friday - Travels with Rain: Lesson 5: Interlacing, Piercing, and Couching Part 1 of 2 October 14 2016, 0 Comments

A few years back we had a feature called "Art Travels with Rain". Rain did a wonderful series on sewing that we are reposting in our Flashback Fridays segments. Please note these may be altered from the original posts to update links, provide information on newer programs, etc.
In case you missed earlier posts in the series:
Art Journaling Sewing Lessons 101
Lesson One: Making Borders and Pockets Using Automatic Machine Stitching
Lesson 2: Using Fusible Interfacings to Attach and Glue Papers and Fabrics
Lesson 3: Thread Painting and Interlacing, Part 1 of 2
Lesson 4: Thread Painting Part 2 of 2
Hello all!
This week we will take a closer look at interlacing and piercing with paper, and begin to look at couching. These are wonderful skills to have in your toolbox for art journal pages, scrapbook or sketchbooks, or other art projects.
Interlacing and Piercing
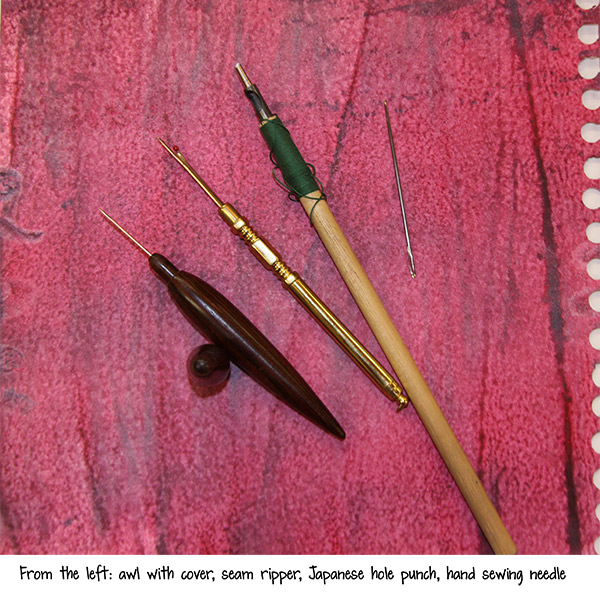
Many thicker and heavier threads, yarns, and ribbons are too big to pass through a sewing machine needle, a smaller hand needle, and really shouldn’t be pulled through paper over and over since eventually both the fiber and the paper will fall apart. This is where piercing a channel through the paper first makes a huge difference, particularly if the hole is stabilized with a brad, an eyelet, or stitching. Piercing a hole before hand stitching on paper also makes it far easier on your wrists and fingers to form the stitch since paper will not fold and bend as easily as a fabric.
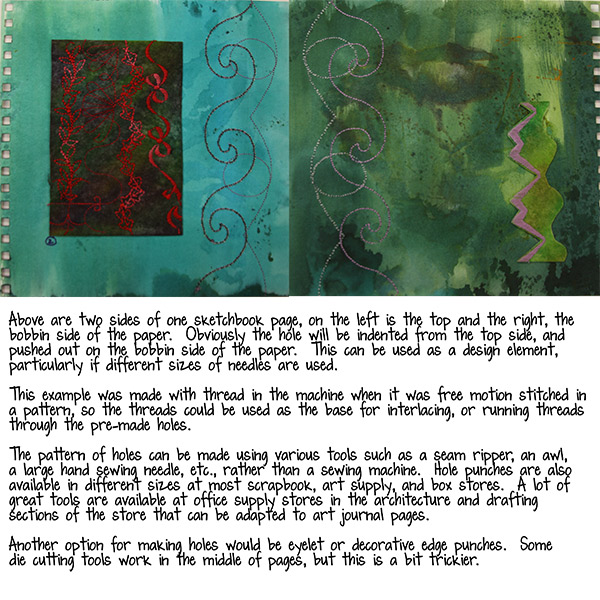
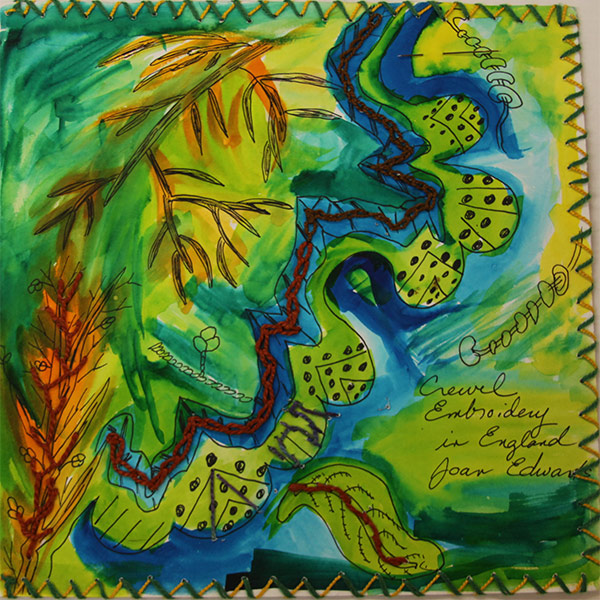
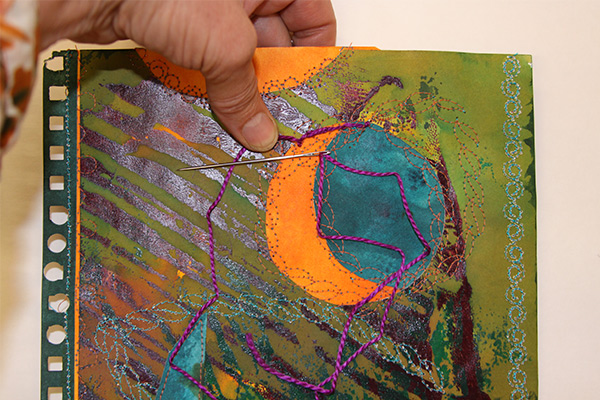
Below are a few pages from my hand stitching sketchbook:


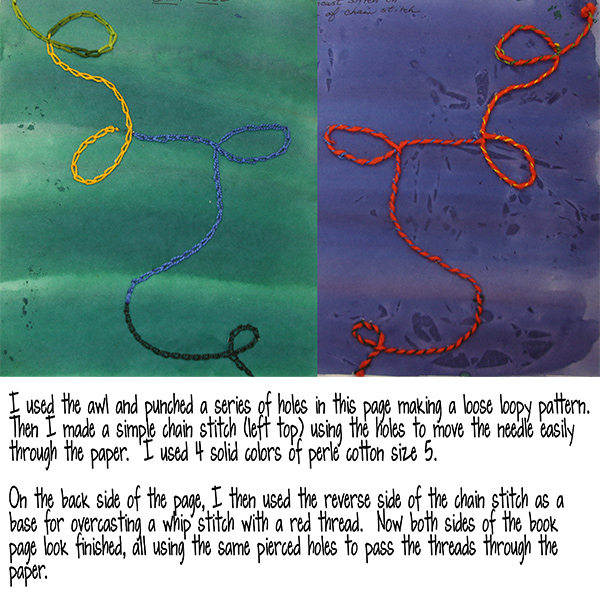
Below is another image of holes that were punched with the larger Japanese hole punch into painted sketchbook paper, and the beginnings of chain stitch.
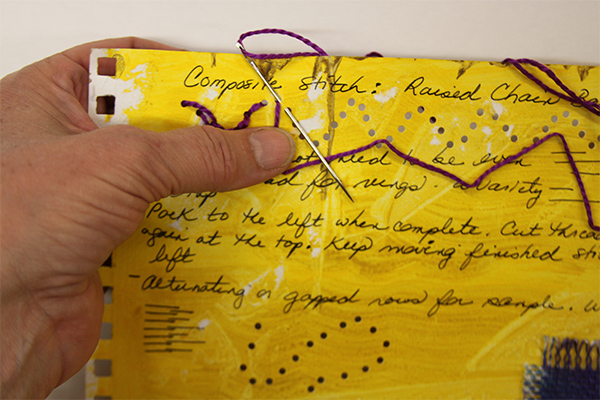
The next two images are the front and back side of one page out of my hand stitching book, with pen, ink, paint and marker drawings. The edges of the page were pierced with a seam ripper first, then overhand stitched first with yellow, then back the opposite way with green. In the lower right corner you can see the back side of the chain and feather stitching.

And another edge with pierced holes:
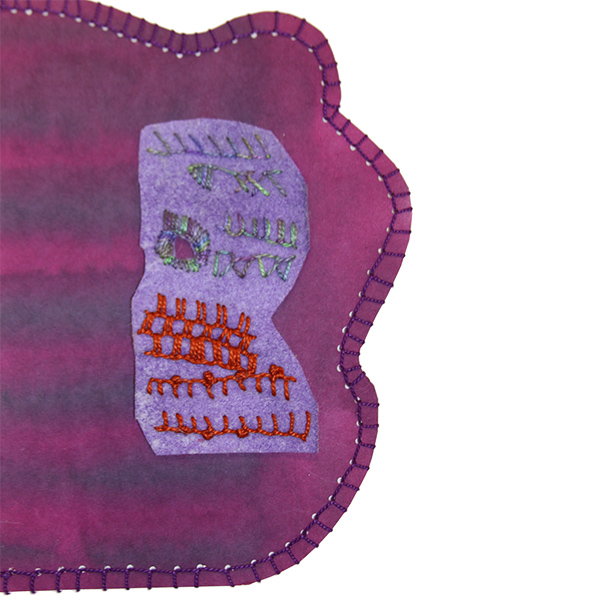
Below is another page from the same book, this one a stitched collage of my painted and monoprinted paper. I am using the machine stitches of the collaged bits to anchor hand stitches with a thicker thread. Since the automatic decorative stitches have a lot of thread bars, I can pick and choose where to insert the needle for my design.
It isn’t necessary to have a sewing machine to make the thread bars, you can also just lace thread through pre-punched holes, then use those thread bars as an anchor for further embellishment.
Let’s look at a “Junque Journal” cover I made from a printed page from Tangie’s “Gypsy Diaries” workshop. Below is the finished and mounted cover:
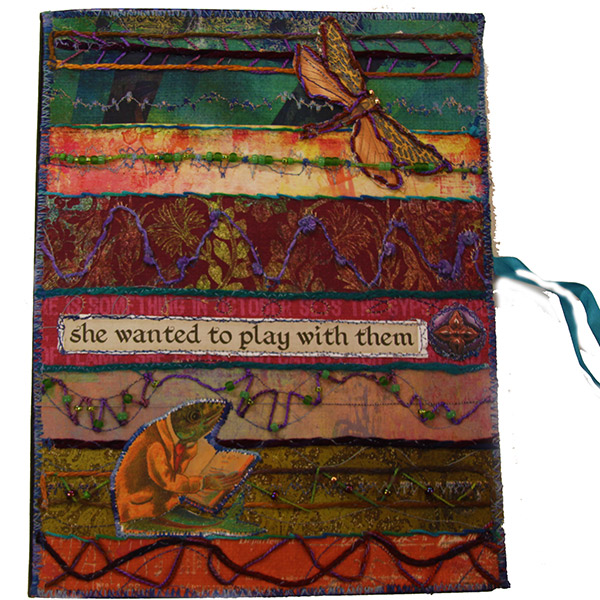
In part 2 of Interlacing, Piercing, and Couching, we will take a close look at making this journal cover which includes all of these techniques.
~~~~~
Please join us next Flashback Friday for another Art Journaling Sewing Lessons installment.
Have a great weekend!
[Posted by: Joy]
