Flashback Fridays - Art Travels with Rain: Making a Tray with Collage January 23 2017, 1 Comment

A few years back we had a feature called "Art Travels with Rain". Please note these may be altered from the original posts to update links, provide information on newer programs, etc.
And don't forget we are featuring Tangible Plans™ Kits all month in TB&CO Treasures! These kits are also great for creating collage sheets like Rain uses in this project.
Enjoy!

Hello!
After a fabulous 12 days with my new grandson, I am home and happily working away in my studio. The weather has shifted towards late fall and early winter and my thoughts are turning towards upcoming holidays. Today I am going to show you a project that is a terrific hostess gift for a holiday party or even just a lift for your own kitchen!
Ok, I have to slip in one photo of the baby boy that has totally stolen my heart and soul:


Ok, Grandma Rain is now willing to move on to art!
I bought these two wood edged trays at IKEA in the sale bin for under $10, with the thought that a collage in the center would improve the look drastically. Given that the center was a melamine type of surface, I used an appropriate glue and printed out various bits and pieces from Tangie Baxter’s kits, including "Día De Los Muertos {CUATRO}", "Field Notes {Fall}", and the "Collage Sheet Mania 2013". I also gathered up leftovers from my collage bin stash from previous projects.
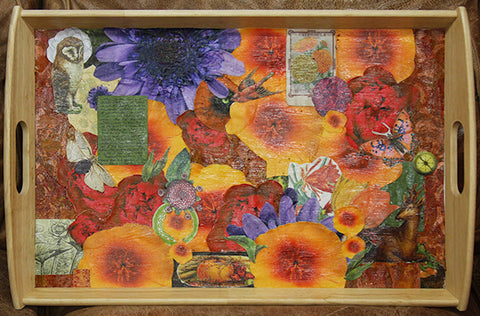
Here are two images below of the finished trays, with two out of three coats of sealant outdoor Mog Podge®:

Let’s take a closer look at the process of creating this type of collage:

Here is the empty tray in all its non-glory! The wood edges are lovely, a soft finished pine, so I could see the potential. I had a few different ideas so I first gathered up a batch of leftover printed “Tangie-ness” to layout some possibilities.

I decided to go for poppies and fall themed items and tried out a few layouts. The second image is not glued, just laid on top of the tray.


I was happy and decided to start applying glue, and of course changed my mind half a dozen times! I used Nori paste made by Yatsutomo brand as I knew it would stick to the melamine surface of the tray, and is water soluble for easy clean up. Plus it gives a bit of time to reposition!

I started on the left and moved to the right, applying the glue to the back of the collage bit with a glue brush on top of an old catalog. I just turn the page whenever it gets too much wet glue, and eventually toss into recycling.


I then let the finished tray dry completely before adding a sealant to the top for waterproofing. In Colorado this takes about an hour! Most climates that have some humidity and aren’t at 6000 feet in elevation would require at least one day to fully dry and harden before applying the sealant of your choice.
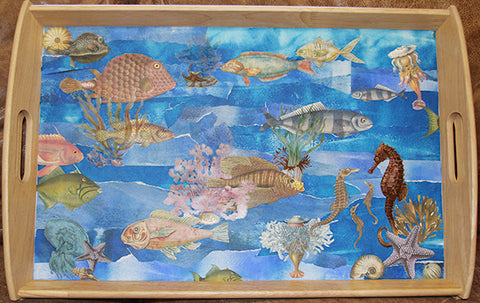
Here’s what I did for the second tray, using collage sheets from Tangie’s “Purple Tide” (Retired, but still available in The Vault), and other ocean related kits, on a background of my own painted paper leftovers from another project. I tore the background papers into strips, and occasionally used the deckle edged ruler to tear against. I then used the same Nori paste to make the background first.

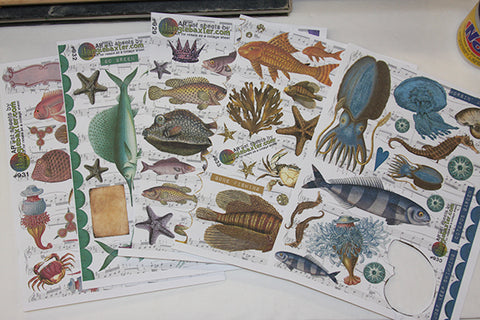


I did some “fussy cutting” around various bits from the collage sheets and added in a few other printouts from a Photoshop file I made from the oceanic kits. I glued each bit down to the background just like the poppy tray, then used a damp paper towel to wipe around the wood.
I also let this tray dry for a good couple of hours here in Colorado before applying the Mod Podge® outdoor waterproof sealant.

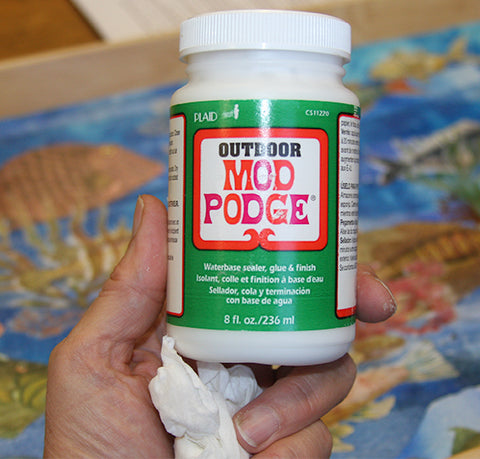
The sealant is your choice…I went with the Mod Podge® because it is water soluble, doesn’t have an off-gas of fumes like most varnish products, and dries quickly. I also often use Polyvine® Wax Varnish, available at your local hardware or paint store, if I can work outside. Today we had snow for the first time and I was feeling moody about getting chilled, so Mod Podge® it is! The image below the product photo is the second coat of sealant on the poppy tray…even in Colorado I allow each coat of sealant to dry for at least one full day, or two if it is damp and raining outside.
Allowing the sealant to dry in several thin coats is far superior for waterproofing, which I desire for a tray that will be used for tea and serving food.

And here we have two images of the drying trays with multiple coats of sealant:

The poppy tray isn’t even close to dry after two full days!
Here’s an image of another tray I am working on for a gardener friend of my cabbage drawings and some photos:

So until next week, I hope you find some time to play with art materials! It certainly has helped me recover from dental work yesterday.
take good care,
Rain
~~~~~
Please join us next Flashback Friday as we continue our journey with Rain.
Have a great weekend!
[Posted by: Joy]

Comments
ljasleutbu on November 13 2020 at 10:56AM
Muchas gracias. ?Como puedo iniciar sesion?