TB& CO - Collage Sheet Easter Baskets April 08 2017, 1 Comment
Hello, I'm Katrina Rollings and I am part of Tangie's Creative Crew.
As Easter is just around the corner now I have a cute little Easter project for you. Easter baskets.
These baskets are so easy to make. They would make lovely Easter gifts filled with your favourite sweet treat, mine as you can see is Cadbury Creme Eggs®!! They would also be a great little project to make with children, they are that easy.
Here is how you make them:
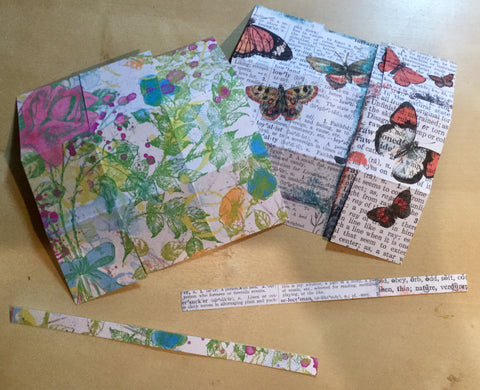
To start with you need some pretty card to make your baskets from. I printed Tangie's ARTist Collage Sheet #763 and ARTist Collage Sheet #779 onto printable card.
I also printed out ARTist Collage Sheet #904. This has lots of pretty coloured eggs and sweet chicks to cut out and decorate your baskets with.

From the background card you need to cut a 6"x 6" square and a thin strip for your handle.
Then cut and fold your card as in the diagram below. Fold your fold lines first, then cut the cut lines.
Once you have your basket scored and cut, fold all the lines.
If you like the inked edge look do that now. You can do it with an ink pad , using a sponge to take the ink from the ink pad and apply to the card edges. Never ink the edges straight from your ink pad, if you have ever had a paper cut you will know how sharp paper and card edges are. The paper edges will cut your ink pad as easily as your finger and will eventually ruin the pad.
If you don't have an ink pad the right colour you can use a felt tip pen. Run the side of the nib along the edge of your card, just be aware it could cut into the nib, so don't use your expensive pens.
Now, there are two ways you can fold you baskets up. You can either have the square piece at the front
Or you can have the square at the back.
You can choose the way you like best.
There are also choices as to how you secure your basket. If you have some brads, also known as split pins, you can punch or poke a hole through all the layers and the end of you handle and attach them all together with the brad on the front and then the same at the back.
Or you can just use glue or double sided tape to attach all the layers to each other as well as the handle of course.
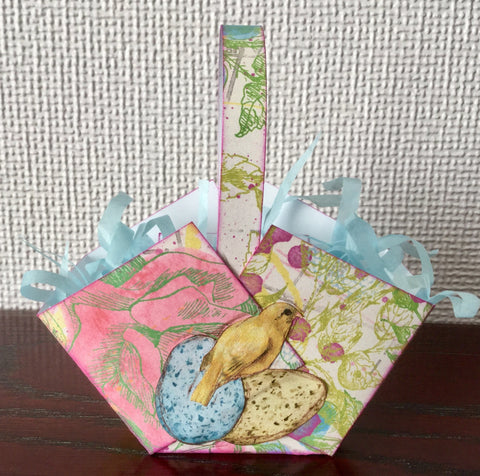
I added some of the eggs and a little chick from Tangie's ARTist Collage Sheet #904 to my flower basket but decided to leave my butterfly basket as it is.
To fill the baskets I cut thin strips of tissue paper and then scrunched it up a bit. Placed some in each basket and popped in a creme egg.
Of course you can add what ever you wish.
These baskets can be scaled up easily to a 9" square to begin with and then score 3" squares instead of 2" as we did here.
Which ever size you make I hope you have lots of fun with these baskets. They really are quick and easy to make but will wow your friends and family.
Oh look, there is a cream egg without a basket!!! Shame to waste it........
So I'm off to pop the kettle on and eat my cream egg with a nice cup of tea.
Have a wonderful Easter, I hope the weather is as beautiful with you as it is here in the South West of England today.
Join me again soon for another mixed media project.
Love Katrina
[Posted by: Katrina Rollings]


Comments
AnneLou Robkin on April 18 2017 at 01:09PM
Very cute! Good for May Day and maybe Mother’s Day, too!