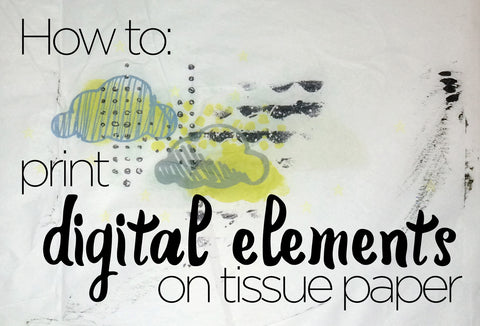
How to Print Digital Elements on Tissue Paper March 17 2016, 2 Comments
Last week I posted something new: an in-depth look Inside My Art Journal and all the elements I pulled together to make my latest art journal page. But, believe it or not, that was not my original intention *gasp*. Instead, the project took on a life of its own and my plan was blown to bits... shocking, right? Not. That just about sums up my every day!
Anywho, I love the way the post and the project turned out (especially the challenge of printing digital elements on tissue paper) and as you loyal readers out there may remember, I hinted at the possibility of a tutorial in the near future. Well, have no fear. The future is now.
One of the things I love about creating physical art (as opposed to full-on digital) is the amazing textures that emerge when you play with new mediums, which is why I was so drawn to the concept of using tissue paper. It's super easy to rip and glue and it really gives a unique tactile quality to your art.
The other reason I thought I'd give printing on tissue paper a whirl is that I absolutely adore paint splatters and scatters. TB&CO has some truly unique elements including stamps, collages, and graffiti; and while they look amazing on my computer screen or in a printed collage sheet, it can be tedious if not outright impossible to print and cut these as stand alone elements. Enter the tissue paper.
My reasoning for the experiment was that the the tissue paper should hold the image of the element well, while creating a clear-ish background when glued to the paper surface, thus negating the need to cut out the element.
The project took me a few run-throughs before I got it right, and for a minute there I thought maybe my printer was doomed (though everything worked out in the end). So, quick disclaimer: attempt this project at your own risk!
You will need:
- Tissue paper I used white, I'm sure other colors will work splendidly
- Printer I have an Epson inkjet
- Cardstock any color
- Tape I used plain clear adhesive
- Whatever else you might want to complete your art journal page
The Basics: Tape the tissue paper to the cardstock (please read the whole post before you attempt). Run the taped cardstock through your printer. Remove the tissue paper, use as you like!
Take one: Here's where I made my first mistake. The first time through I only taped the paper to the corners of the cardstock, reasoning that I didn't want to rip the tissue paper when I removed it after printing.
This did not work.
The printer gripped to the tissue paper, not the cardstock, and almost jammed the printer. Chalk it up to a learning experience.
Take two: I taped the tissue paper to the top and bottom of the cardstock, using a generous amount of adhesive.
Again, failure.
The printer gripped just the tissue paper more voraciously than before. This time it chomped the tissue paper into pieces. It was no picnic to pluck out, but everything was removable in the end. No worries, I had a ton of tissue paper to play with.
Take three: I taped the tissue paper to the cardstock all around the edges. This time I was less worried about ripping the paper in the end than I was with the printer eating it for a third time, so I was generous with the tape.
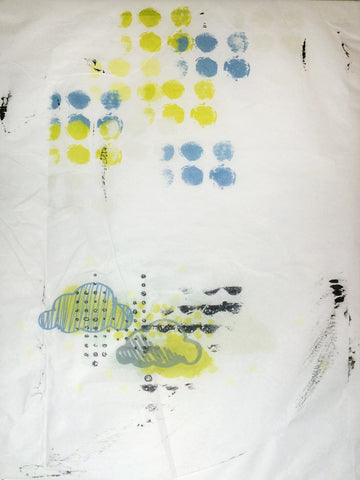
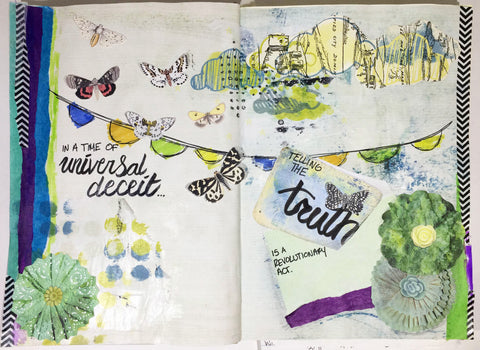
Voila! It finally worked. The printer gripped both the cardstock and the tissue paper together and printed the lovely image you see below. If I were to try the project again I might try a combination of tape and spray adhesive to ensure the tissue paper was firmly planted to the cardstock.
[Credits: TB&CO Grab Bag #19, now available as separate kits, Tangie Bundle No. 19, Rebecca Bundle No. 19 ]

The ink got a little sloppy, as you can see. But you know what? This is art journaling! There's no such thing as sloppy!
I trimmed up the printed elements and glued them to some beautiful digital papers in my art journal added some more glorious embellishments, and doodles, and I have to say, I am quite pleased with the way it came out. The final product:
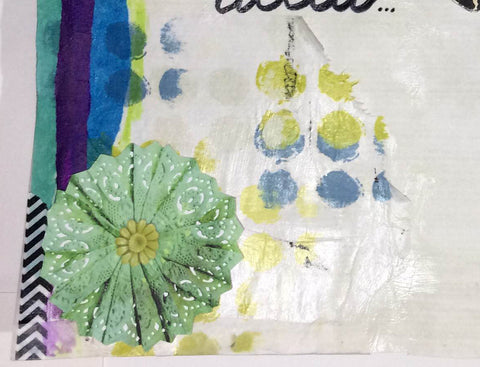
Here are a few close-ups of the tissue paper printed elements. I love how it just blends right in with the background:
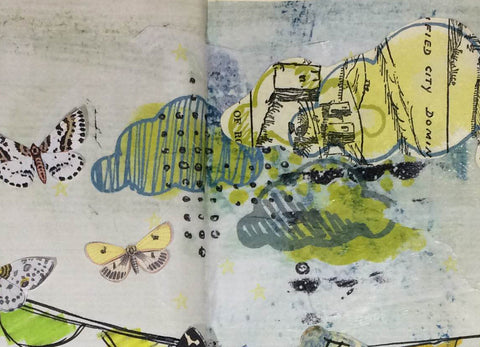
The second piece has a bit of a gloss to it that I didn't anticipate, but I suspect it had to do with the glue that I used. If you are looking for a more matte effect I would avoid glossy finish glue.
Thanks for stopping by and checking out my latest adventure in the world of art journaling. What techniques are you using right now to keep things fresh and fun? Leave us a comment below!
Don’t forget Monthly Grab Bags are only available for a limited time once a month and priced on a sliding scale. Act fast for the best deal. For more information visit TB&CO Grab Bags.
For more information on the Art Journal Emporium visit Art Journal Emporium - Tangie Baxter & CO.
[Posted by Karli-Marie]
Comments
Carolyn on March 18 2016 at 11:48PM
I LOVE this technique but never thought to print the graffiti and splatters on tissue paper. You’re a genius!
Stacy Crookston on March 18 2016 at 06:31PM
Karli-Marie, this is fabulous! Thanks so much for the fun tutorial, I can’t wait to try it! Love your journal pages too.