Flashback Friday- Art Travels with Rain: Lesson 2: Using Fusible Interfacings to Attach and Glue Papers and Fabrics September 09 2016, 0 Comments

A few years back we had a feature called "Art Travels with Rain". Rain did a wonderful series on sewing that we are reposting in our Flashback Fridays segments. Please note these may be altered from the original posts to update links, provide information on newer programs, etc.
In case you missed earlier posts in the series:
Art Journaling Sewing Lessons 101
Lesson One: Making Borders and Pockets Using Automatic Machine Stitching
Enjoy!

Hello!
On into Lesson 2, to learn about using fusible interfacings, and the magic possible when combining these handy products with paper, fabric, and stitch for your art journal or other projects.
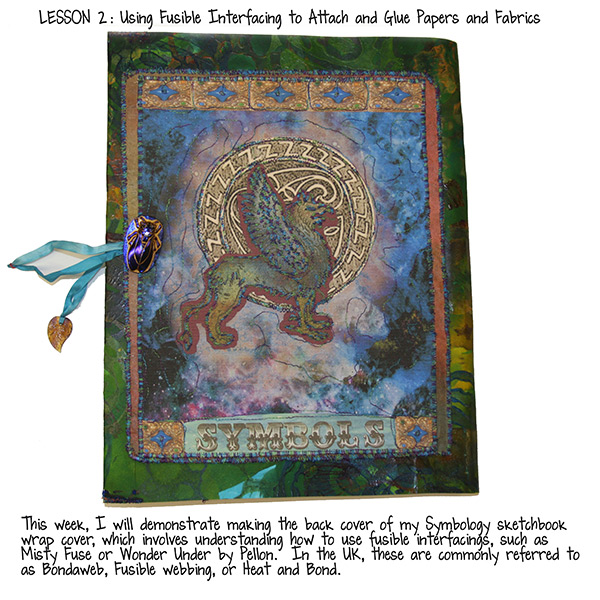
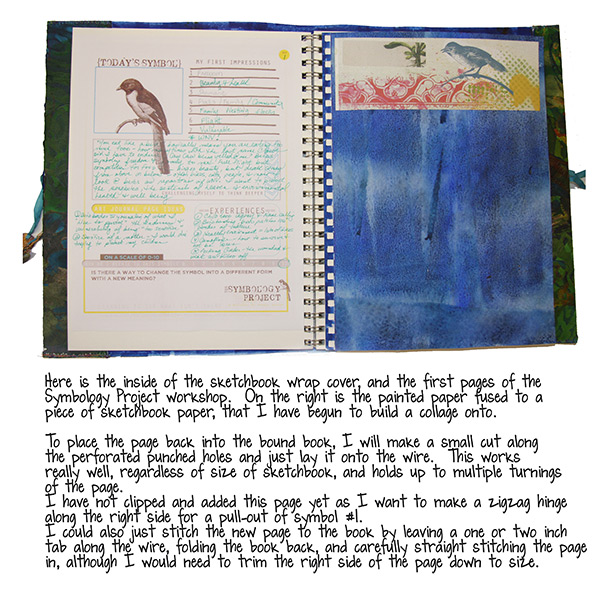
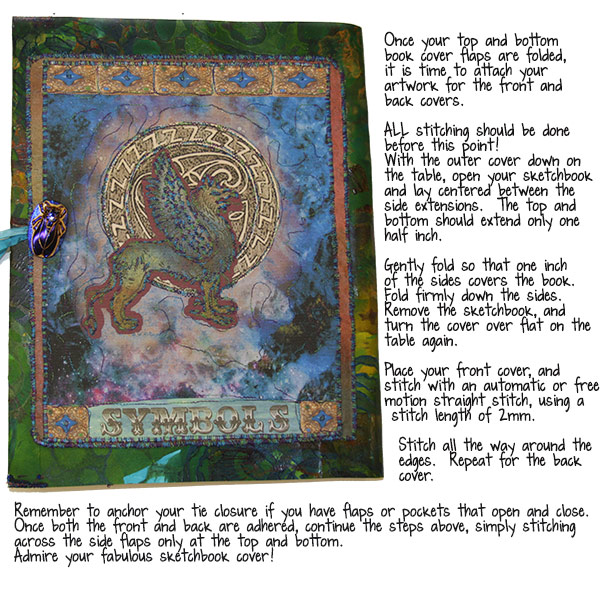
I have already stitched my back cover decoration, using the same page as the inner flap from last week’s Lesson 1, this time printed on a canvas paper. I have mounted the back cover panel to a piece of Lutrador interfacing that was previously painted, and free motion zigzag stitched all the edges. Above is the finished sketchbook wrap cover for my Symbology Project workbook (part of Tangie Baxter’s Symbology workshop now available as a self-study course), and below is an image of the inner cover and page one of the workshop. Let’s take a look at the specifics of using fusible interfacing for this type of project, and then I will demonstrate how to make up the wrap cover.
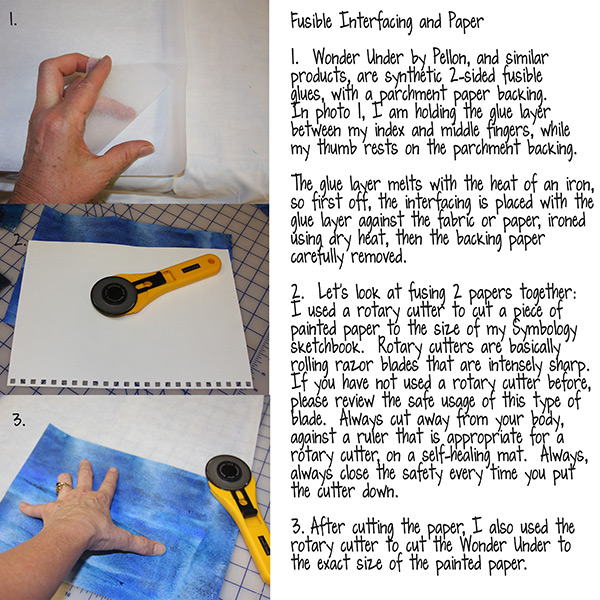
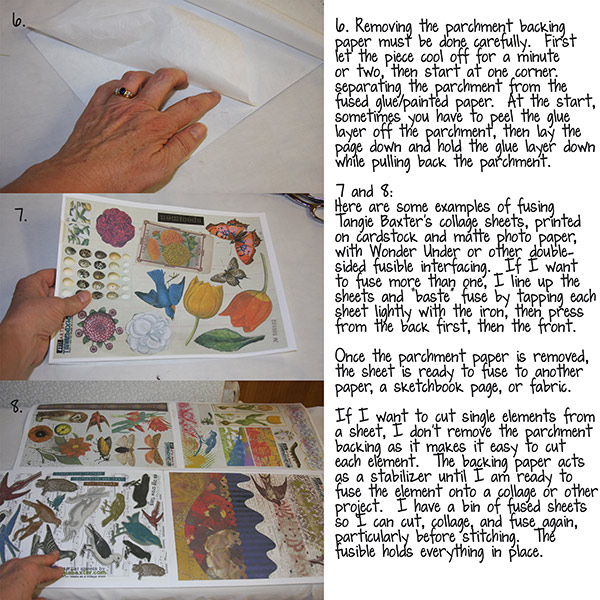
What exactly is fusible interfacing? Over on Planet Quilt, fusibles have been used for years to hold applique’ or other pieces in place while stitching. There are one-sided and two-sided fusibles, and for the art journal and book artist, the two-sided products are the most useful. I often fuse paper to other paper or fabric, as well as ephemera, postcards, print outs, paintings, etc., but I avoid fusing photos that are precious or need archival treatment. Since free motion embroidery by machine is a bit uncontrolled, fusing first can feel like having a third hand, holding elements in place while sewing. Also, as we venture in the future into machine stitched cords and trims, dissolvable stabilizer lace and writing, and other fabulous embellishment tricks, fusible interfacing will become a close friend and ally! These products have transformed my ability to create collages with paper and fabrics mixed together, easily and quickly.
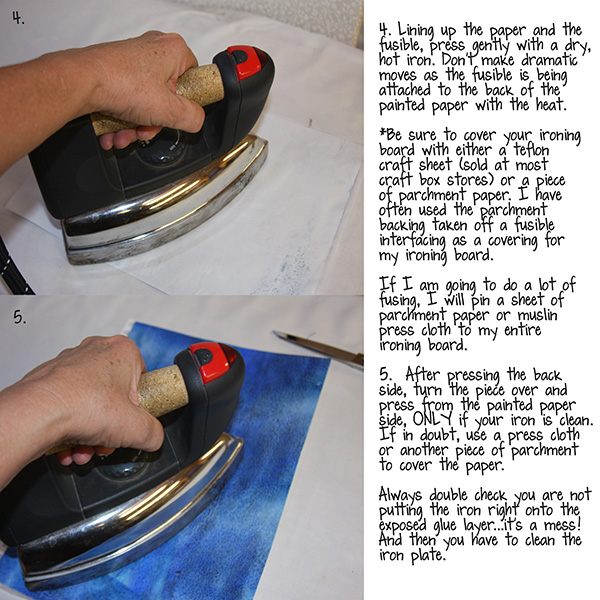
There are a lot of two-sided products, and in the U.S. Pellon company’s Wonder Under is probably the best known. Most box stores have half-off coupons regularly, and this is when I buy Wonder Under, Misty Fuse, or other “glue” fusibles. For our purposes today, I want to focus on the paper-backed two sided products like Wonder Under. After fusing the exposed glue layer to a paper or fabric, the backing parchment paper is removed, exposing the second glue layer…this can then be fused to a base or whatever I’d like, hence gluing with an iron rather than a wet glue.
Let’s look at two pieces of mine where I used fusible interfacing:
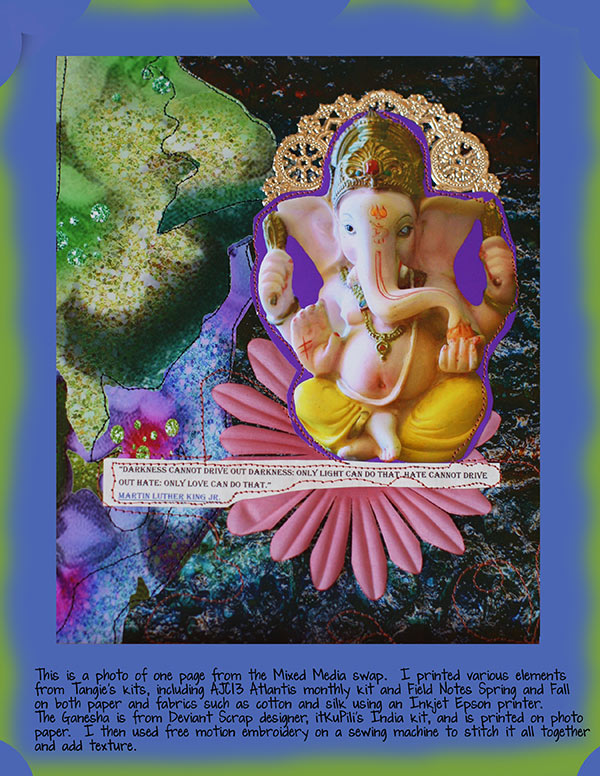
This page is from Tangie’s mixed media swap that took place back in May for the Art Journal Caravan participants. I first printed various papers, elements, and the Ganesha onto fabrics and papers using an inkjet printer. Then I fused Wonder Under to the back of each page before cutting apart borders, elements, etc. Each was then pressed with a dry, hot iron onto a base paper and free motion stitched.
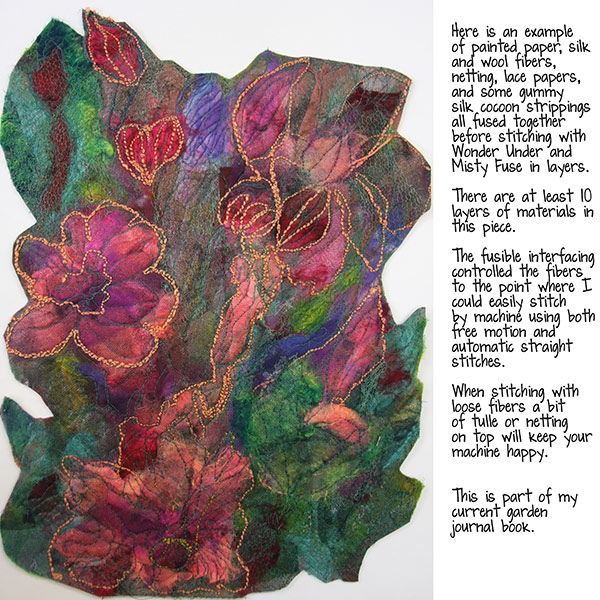
The above floral image is an example of many layers fused one on top of the other as I created the piece from various dyed fibers and painted papers. This is part of my current garden journal.
Are you getting excited yet? Ok, well fasten your seat belt because there is another entire level of art and design possible with fusible interfacing: it can be painted and still function as a two-sided glue! The possibilities of creating backgrounds, foregrounds, embellishments, book covers, clothing, on and on, are just endless.
The easiest method is using an old metal tray or one of those horrible styrofoam cooler lids or other packing material as a paint board. I have covered larger pieces of styrofoam packing with muslin fabric, duct taping the back. After I’ve painted on the boards for awhile the muslin becomes an amazing piece of fabric itself, so I remove it and heat set. Sometimes I give the fabric a wash of dye or fabric paint to unify the markings, but honestly, without any planning at all most of the muslin comes out terrific. Or, you could use large sheets of drawing paper to do the same thing, basically doubling your stash with the same amount of materials.
I first gently remove the glue layer from the parchment backing, then lay it back down on top of the backing. Acrylic paints work best, although I have gotten good effects with watercolor paints. If the end piece will be sprayed with water or other mediums, the watercolor can reconstitute and run, so I usually stick to acrylics. Dilute the paint if using heavy body or thicker acrylics, then all options are open: dribble, brush, brayer, etc. Until the layer is covered.
Allow to dry, then separate the layers if you haven’t already done so. Now just use the glue layer as before. Voila’! Instant lovely.
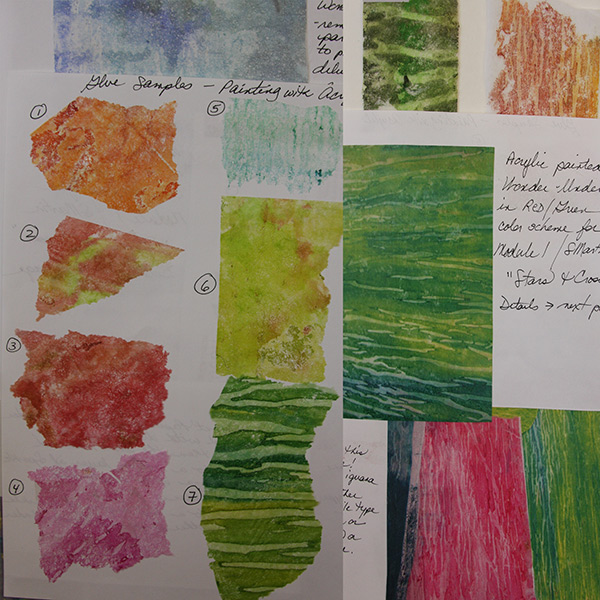
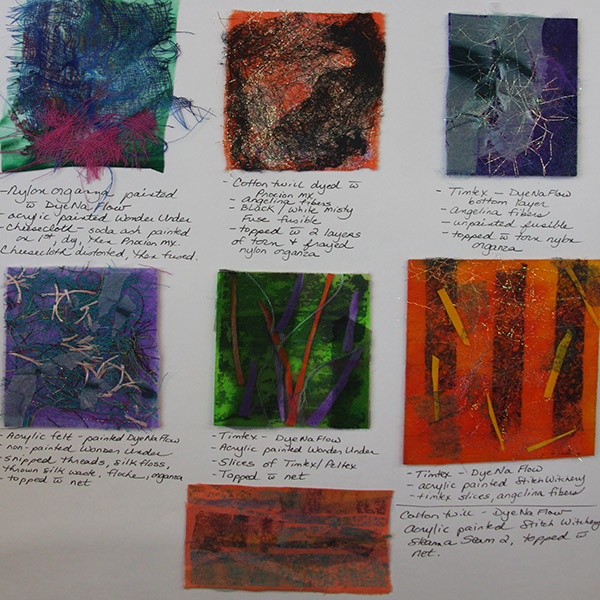
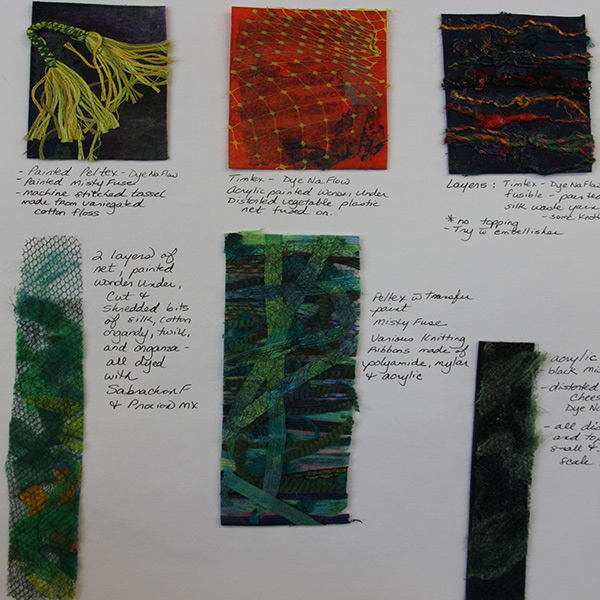
Here are some examples from my “Experiments with Media” sketchbook:
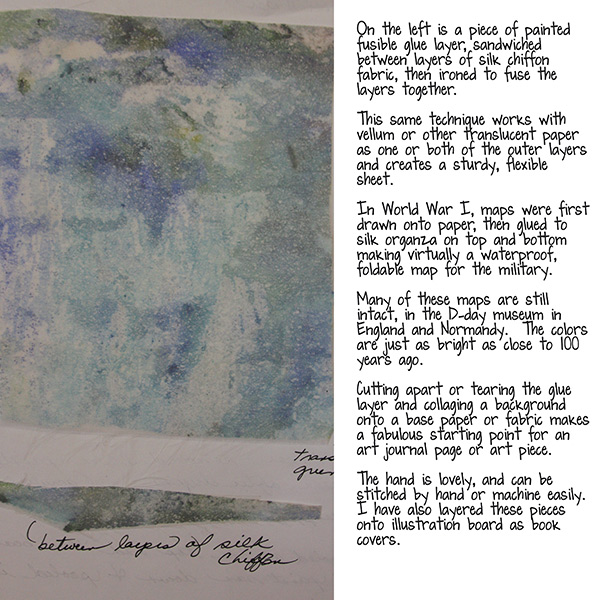
When the glue layer is painted, both sides are gorgeous, and fusing between transparent fabrics or paper will give you a double sided fabric or page to work with.
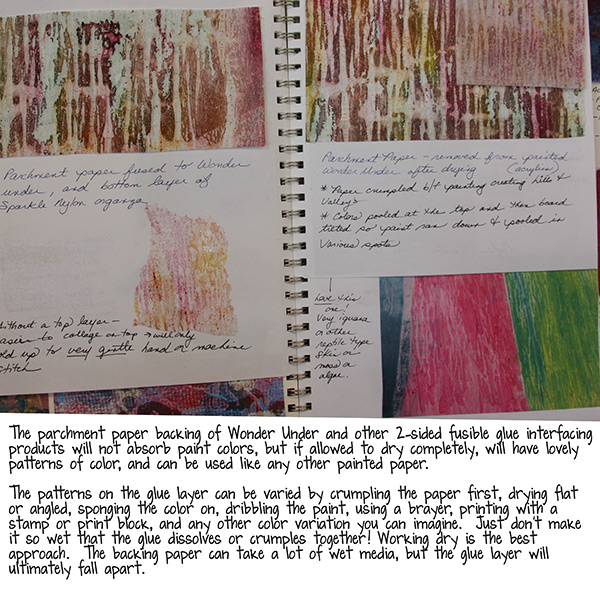 The backing paper becomes usable in its own right! Below are three pages of experiments with fusible interfacing and a variety of items I have glued down:

Now let’s look at how I used fusible interfacing to make the Symbology Project workshop sketchbook wrap cover: first I made a painted large piece of 100 pound paper using acrylic paints and stamps. I dried one side, then fused some thinner copy paper printed with basic color. Any combination you desire will work for a paper cover, including brown Kraft paper or bags, drawing paper painted or decorated on both sides, scrapbook larger sheets of paper, etc., whatever your heart desires. Since I made a stitched front with pockets and flaps, and a back that forms a pocket, I made the paper wrap coordinate with the stitched pieces.
First, complete any machine or hand stitching on the front and back decorative covers. Then lay down your paper for the cover wrap, outer side down, and follow the instructions in the image below: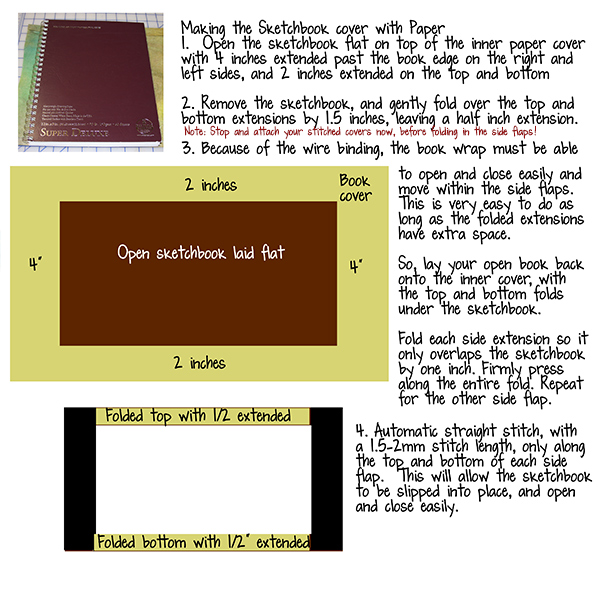
~~~~~
Please join us next Flashback Friday for another Art Journaling Sewing Lessons installment.
Have a great weekend!
[Posted by: Joy]
